Magnetic Crosshead Work Boards
Easy to build DIY Portable Magnetic Elevator Crosshead Work Boards.
In this post I go over the Steps, Material & Tools used to creat this portable magnetic work surface. I also explain the choice of materials, some of the unique features, how & why I use it.
Page 1: Overview, Material List & Instructions
Page 2: Photos, Read More, FAQ & Recipient List

A great way you can help support this website and YouTube Channel is by using the affiliate links below. Remember, anything you purchase once you enter through a link (even if it’s not the item linked) may earn me a small commission at no extra cost to you. Thanks!
Click here to Subscribe my Youtube Channel
2 Easy Steps to Build Xhead Work Boards
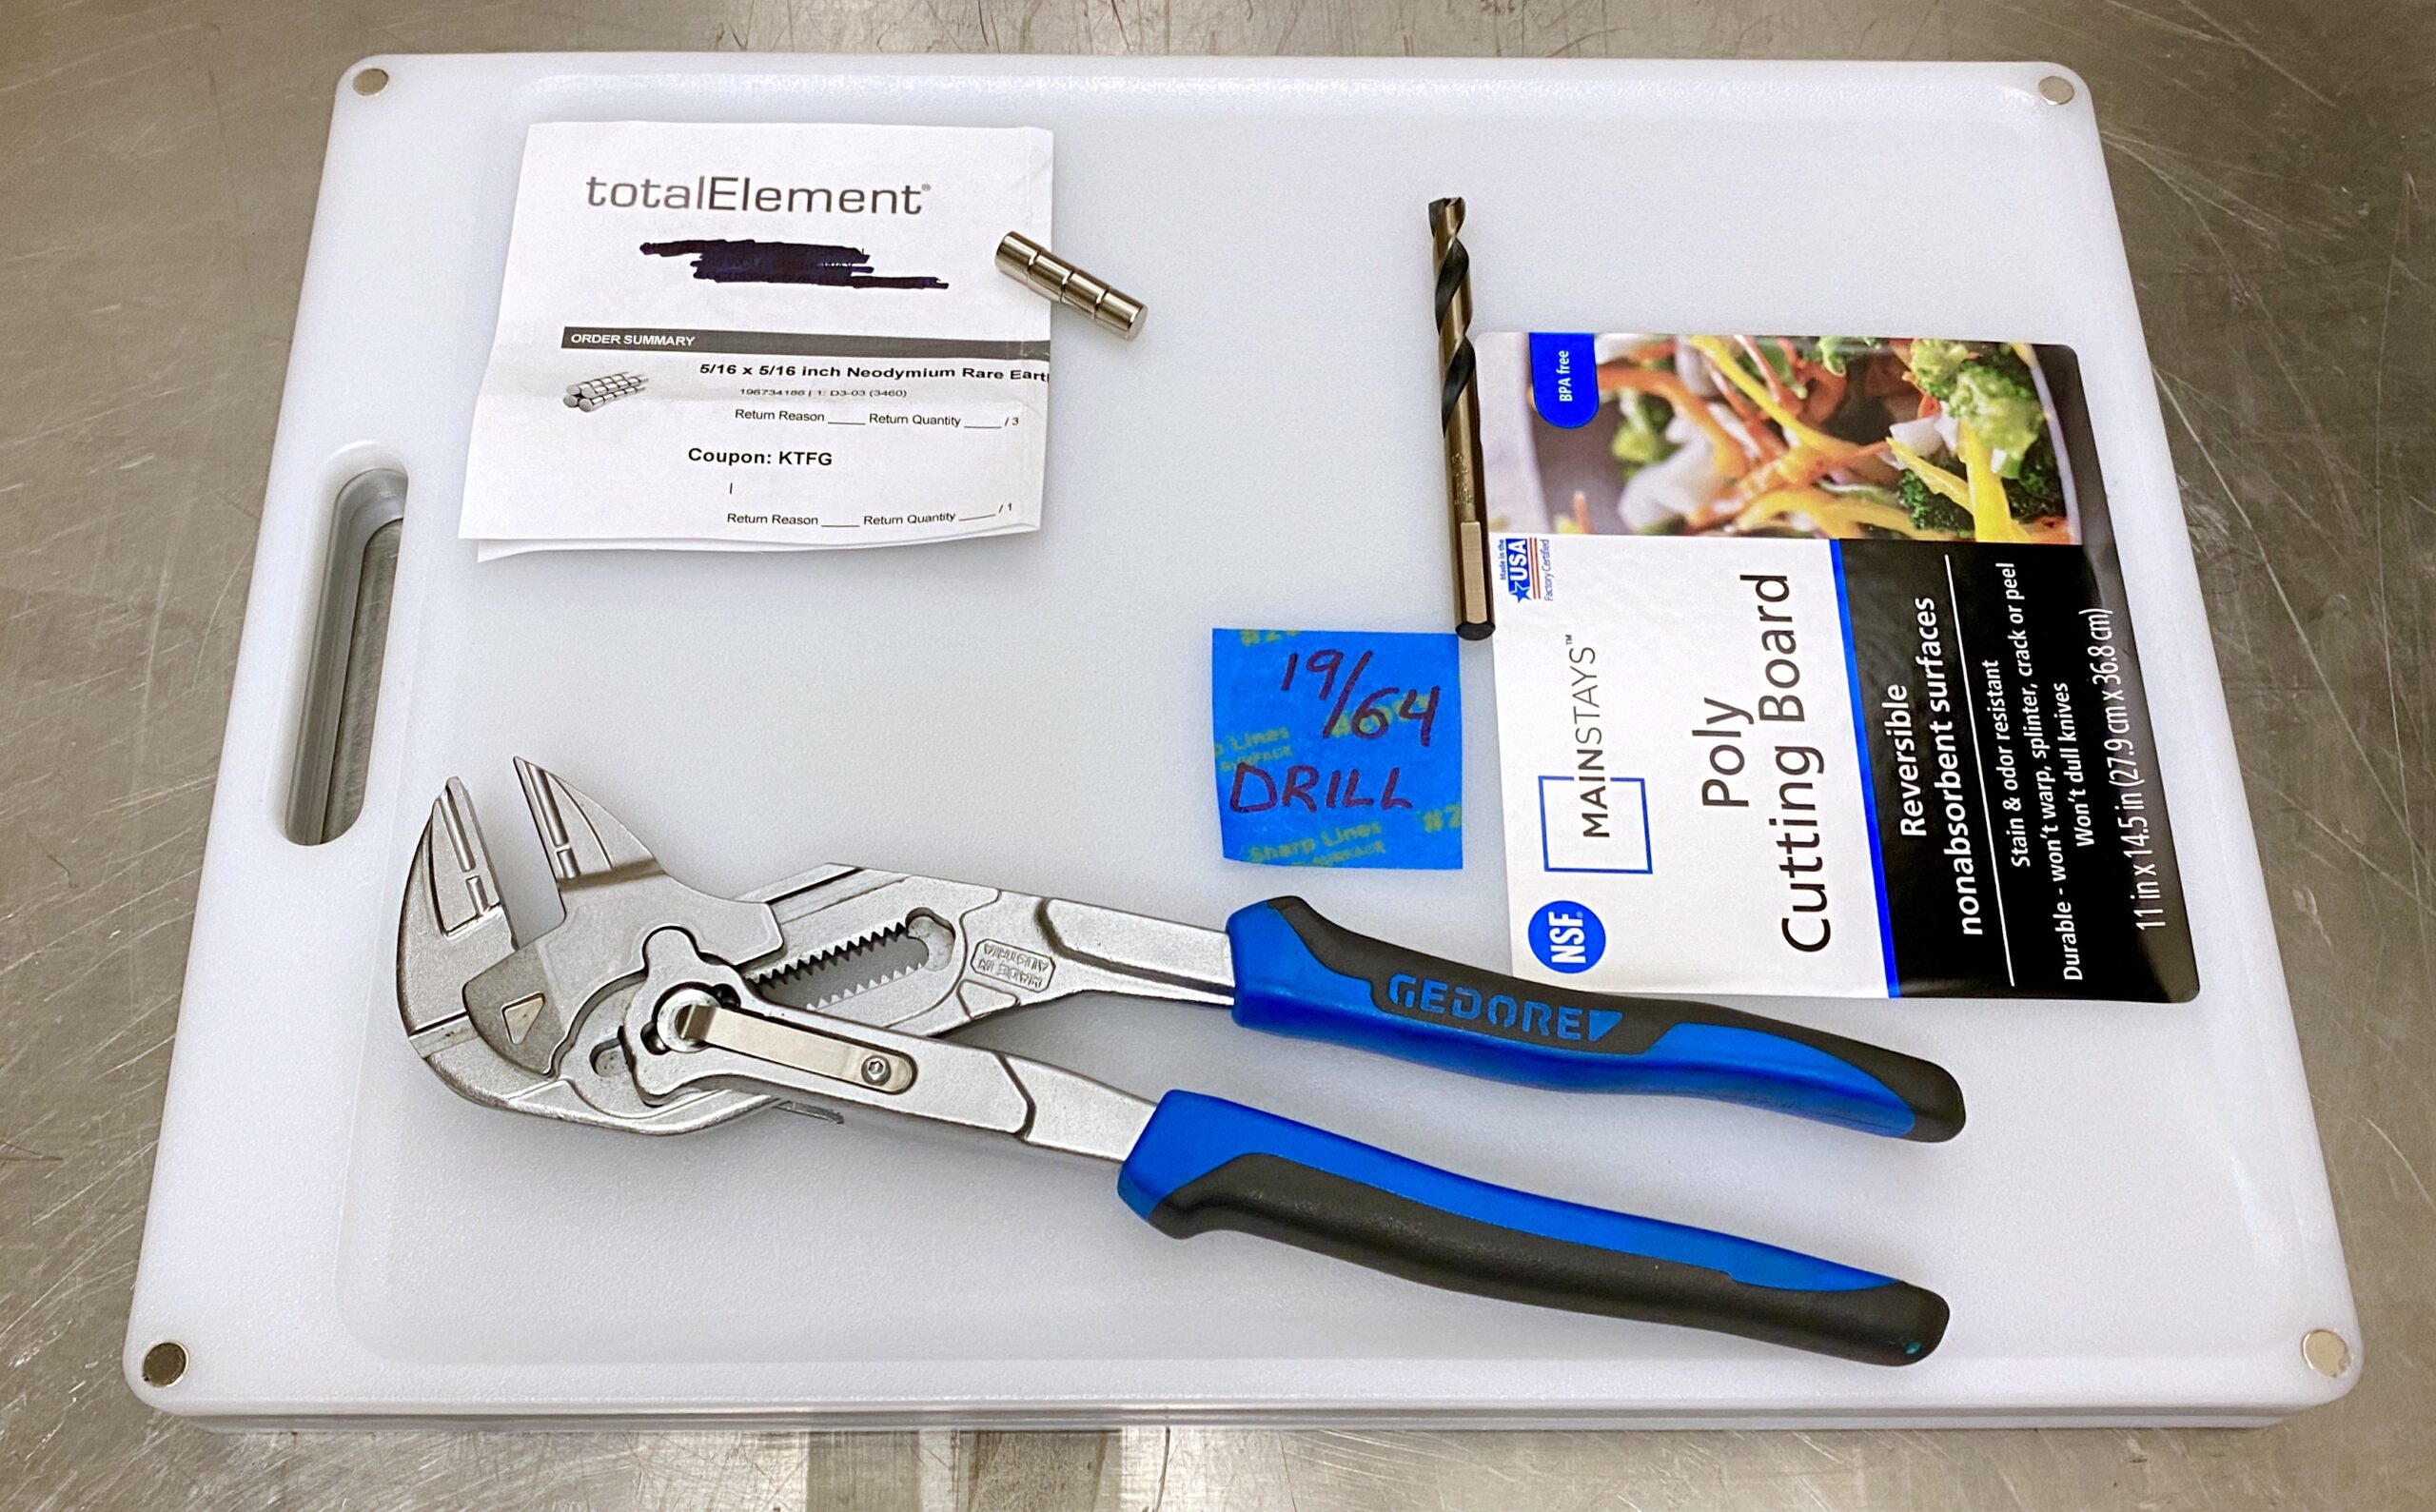
Step 1: Drill & taper 19/64 magnet hole.
Step 2: Embed the 5/16″ cylinder magnets.
Optional: Laser Engrave
It’s that easy to build your own Magnetic Cross Head Work Boards but why, what are they for?
Magnetic Work Board in use
What are Xhead Work Boards and what are they used for?
I primarily use these crosshead work boards as a location to conveniently put a tool bag, tools and material when performing tasks such as door work, changing roller guides etc. These specific boards can be use on the flat side or the recessed side which is good for holding hardware, drill bits and objects that may roll around. They have 4 super strong N48 Neodymium magnets so they stick to the crosshead.

They are a simple, inexpensive, compact, portable solution to a problem. That problem is where to safely & conveniently store material, tools and/or a tool bag while working on top of an elevator. For certain tasks they are great, however I shouldn’t have to state the obvious but it’s not a Gerber multi-tool meant for every task. If you need a place to store a chain fall,I have other products for major repairs including my Crosshead Work Boxes, Slide Tops & Car Top Carts (click here or see below).
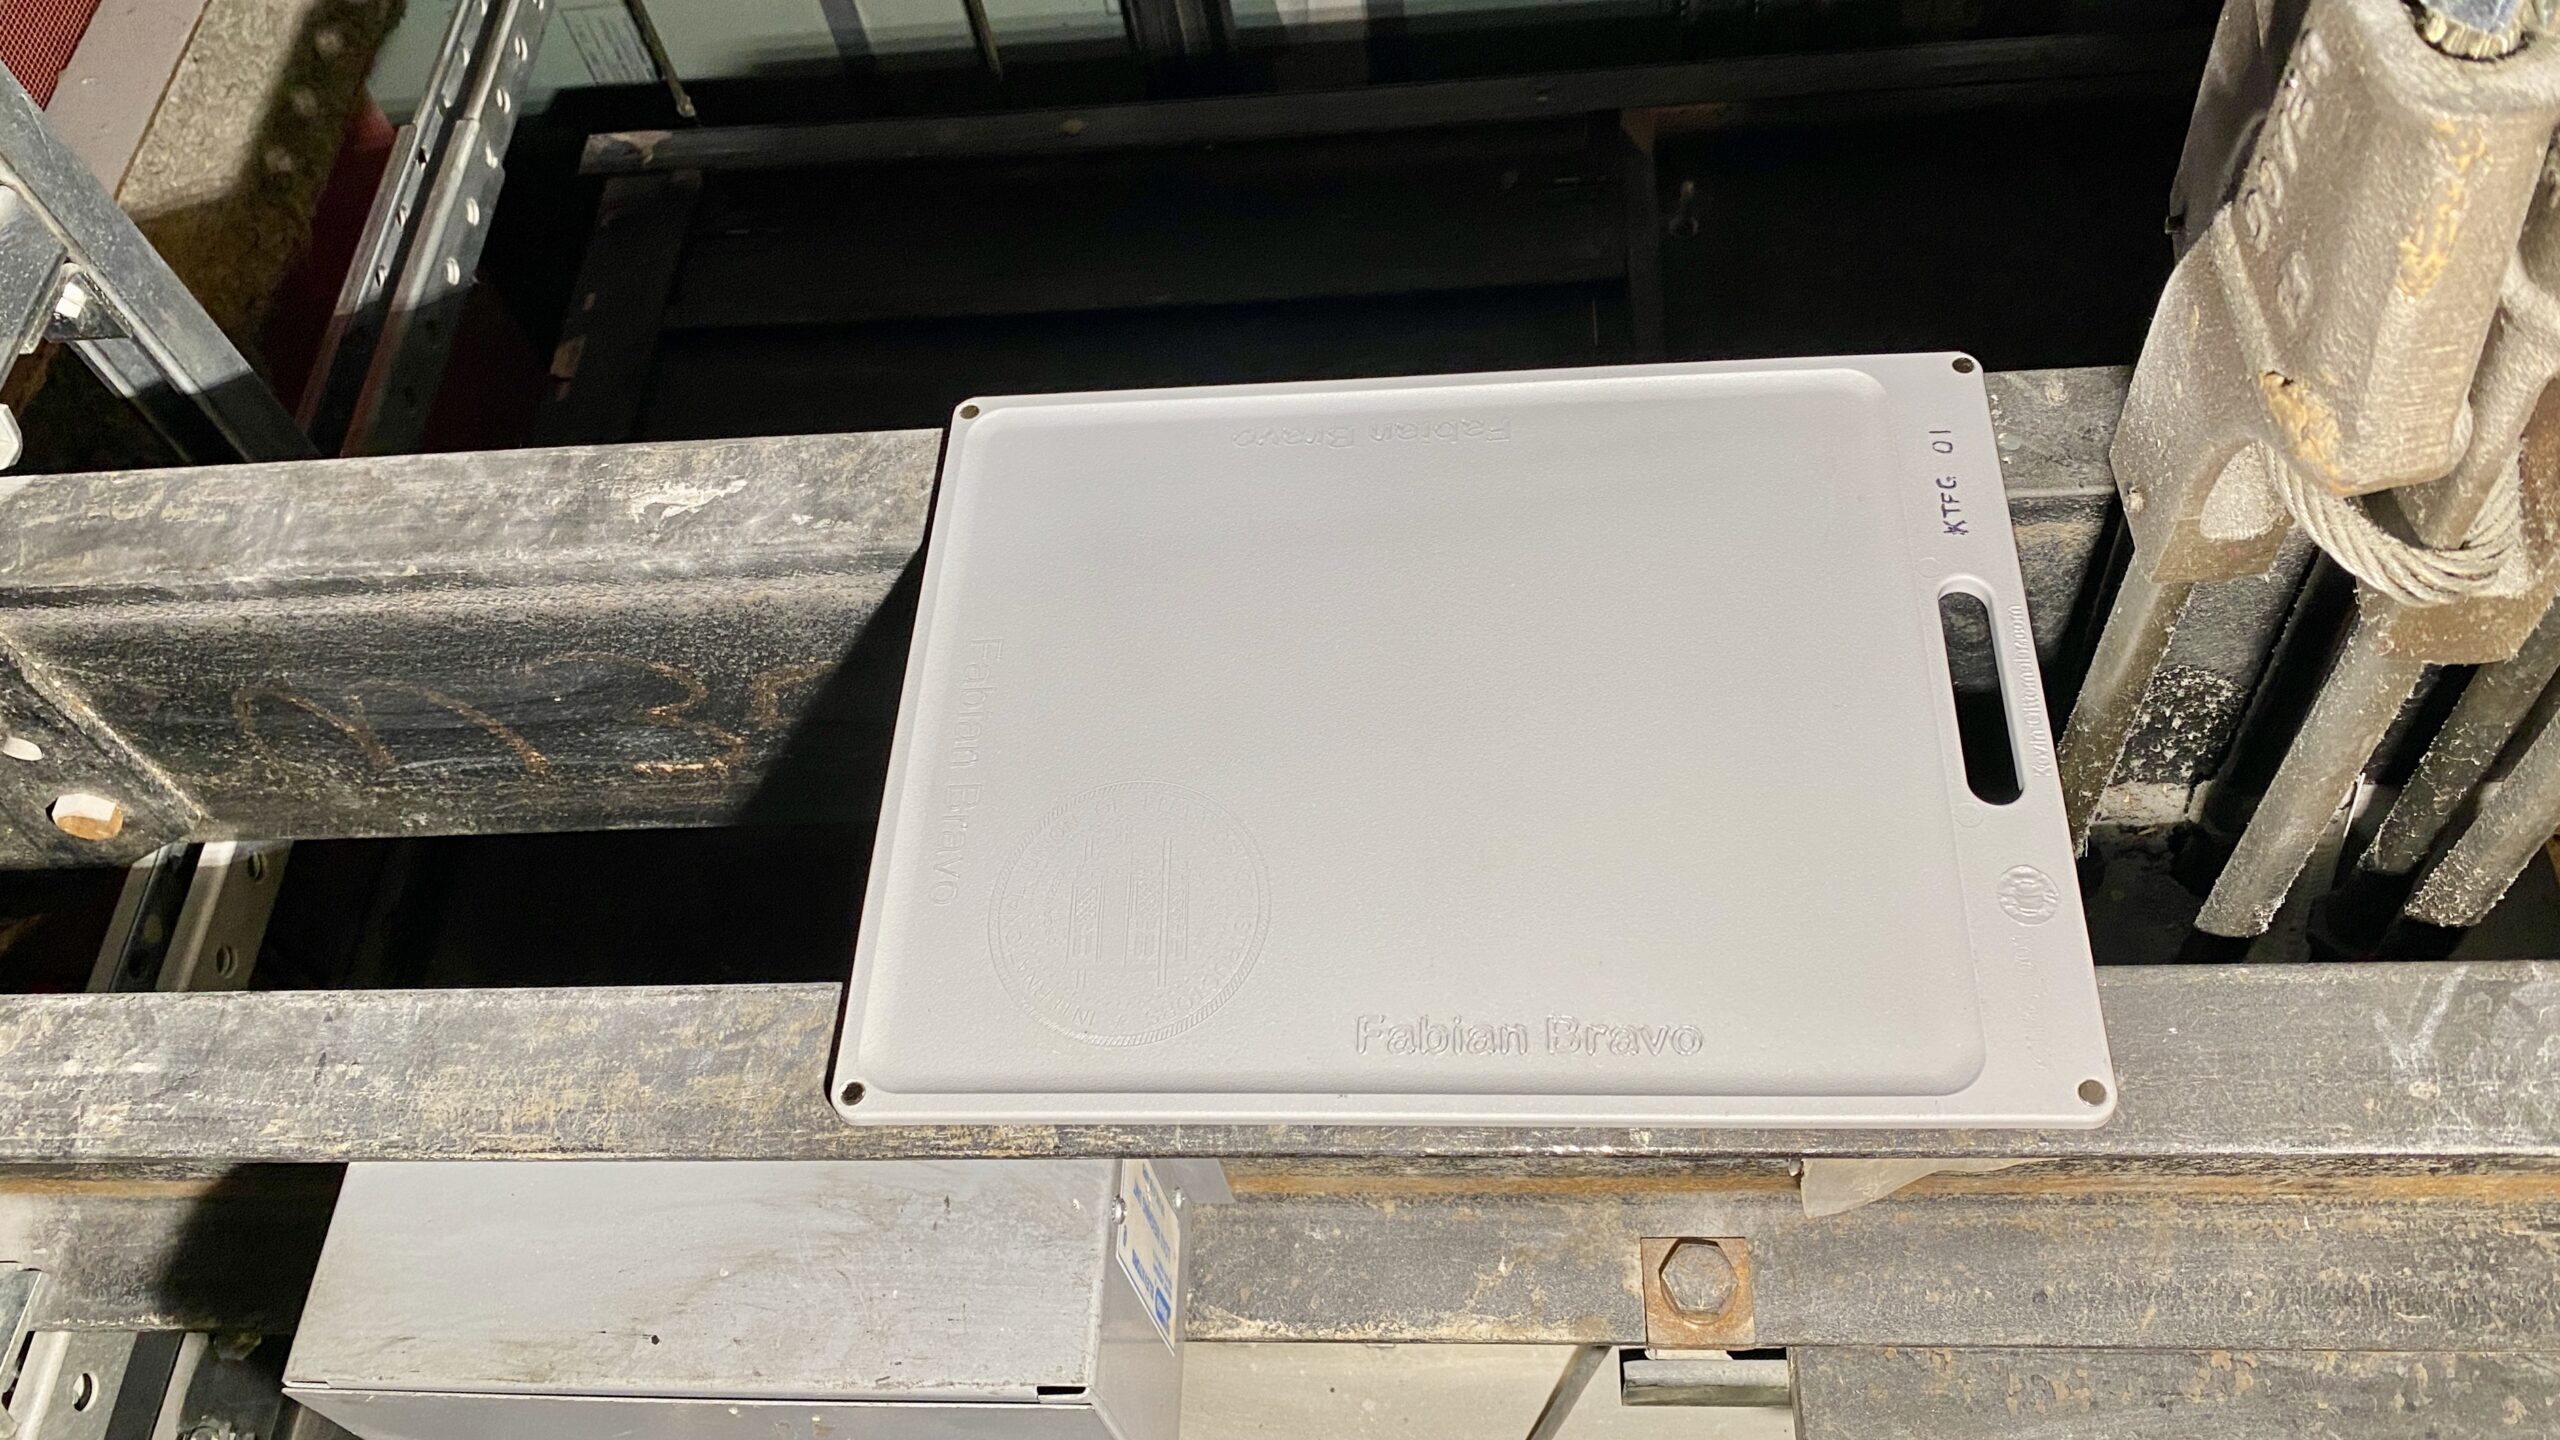
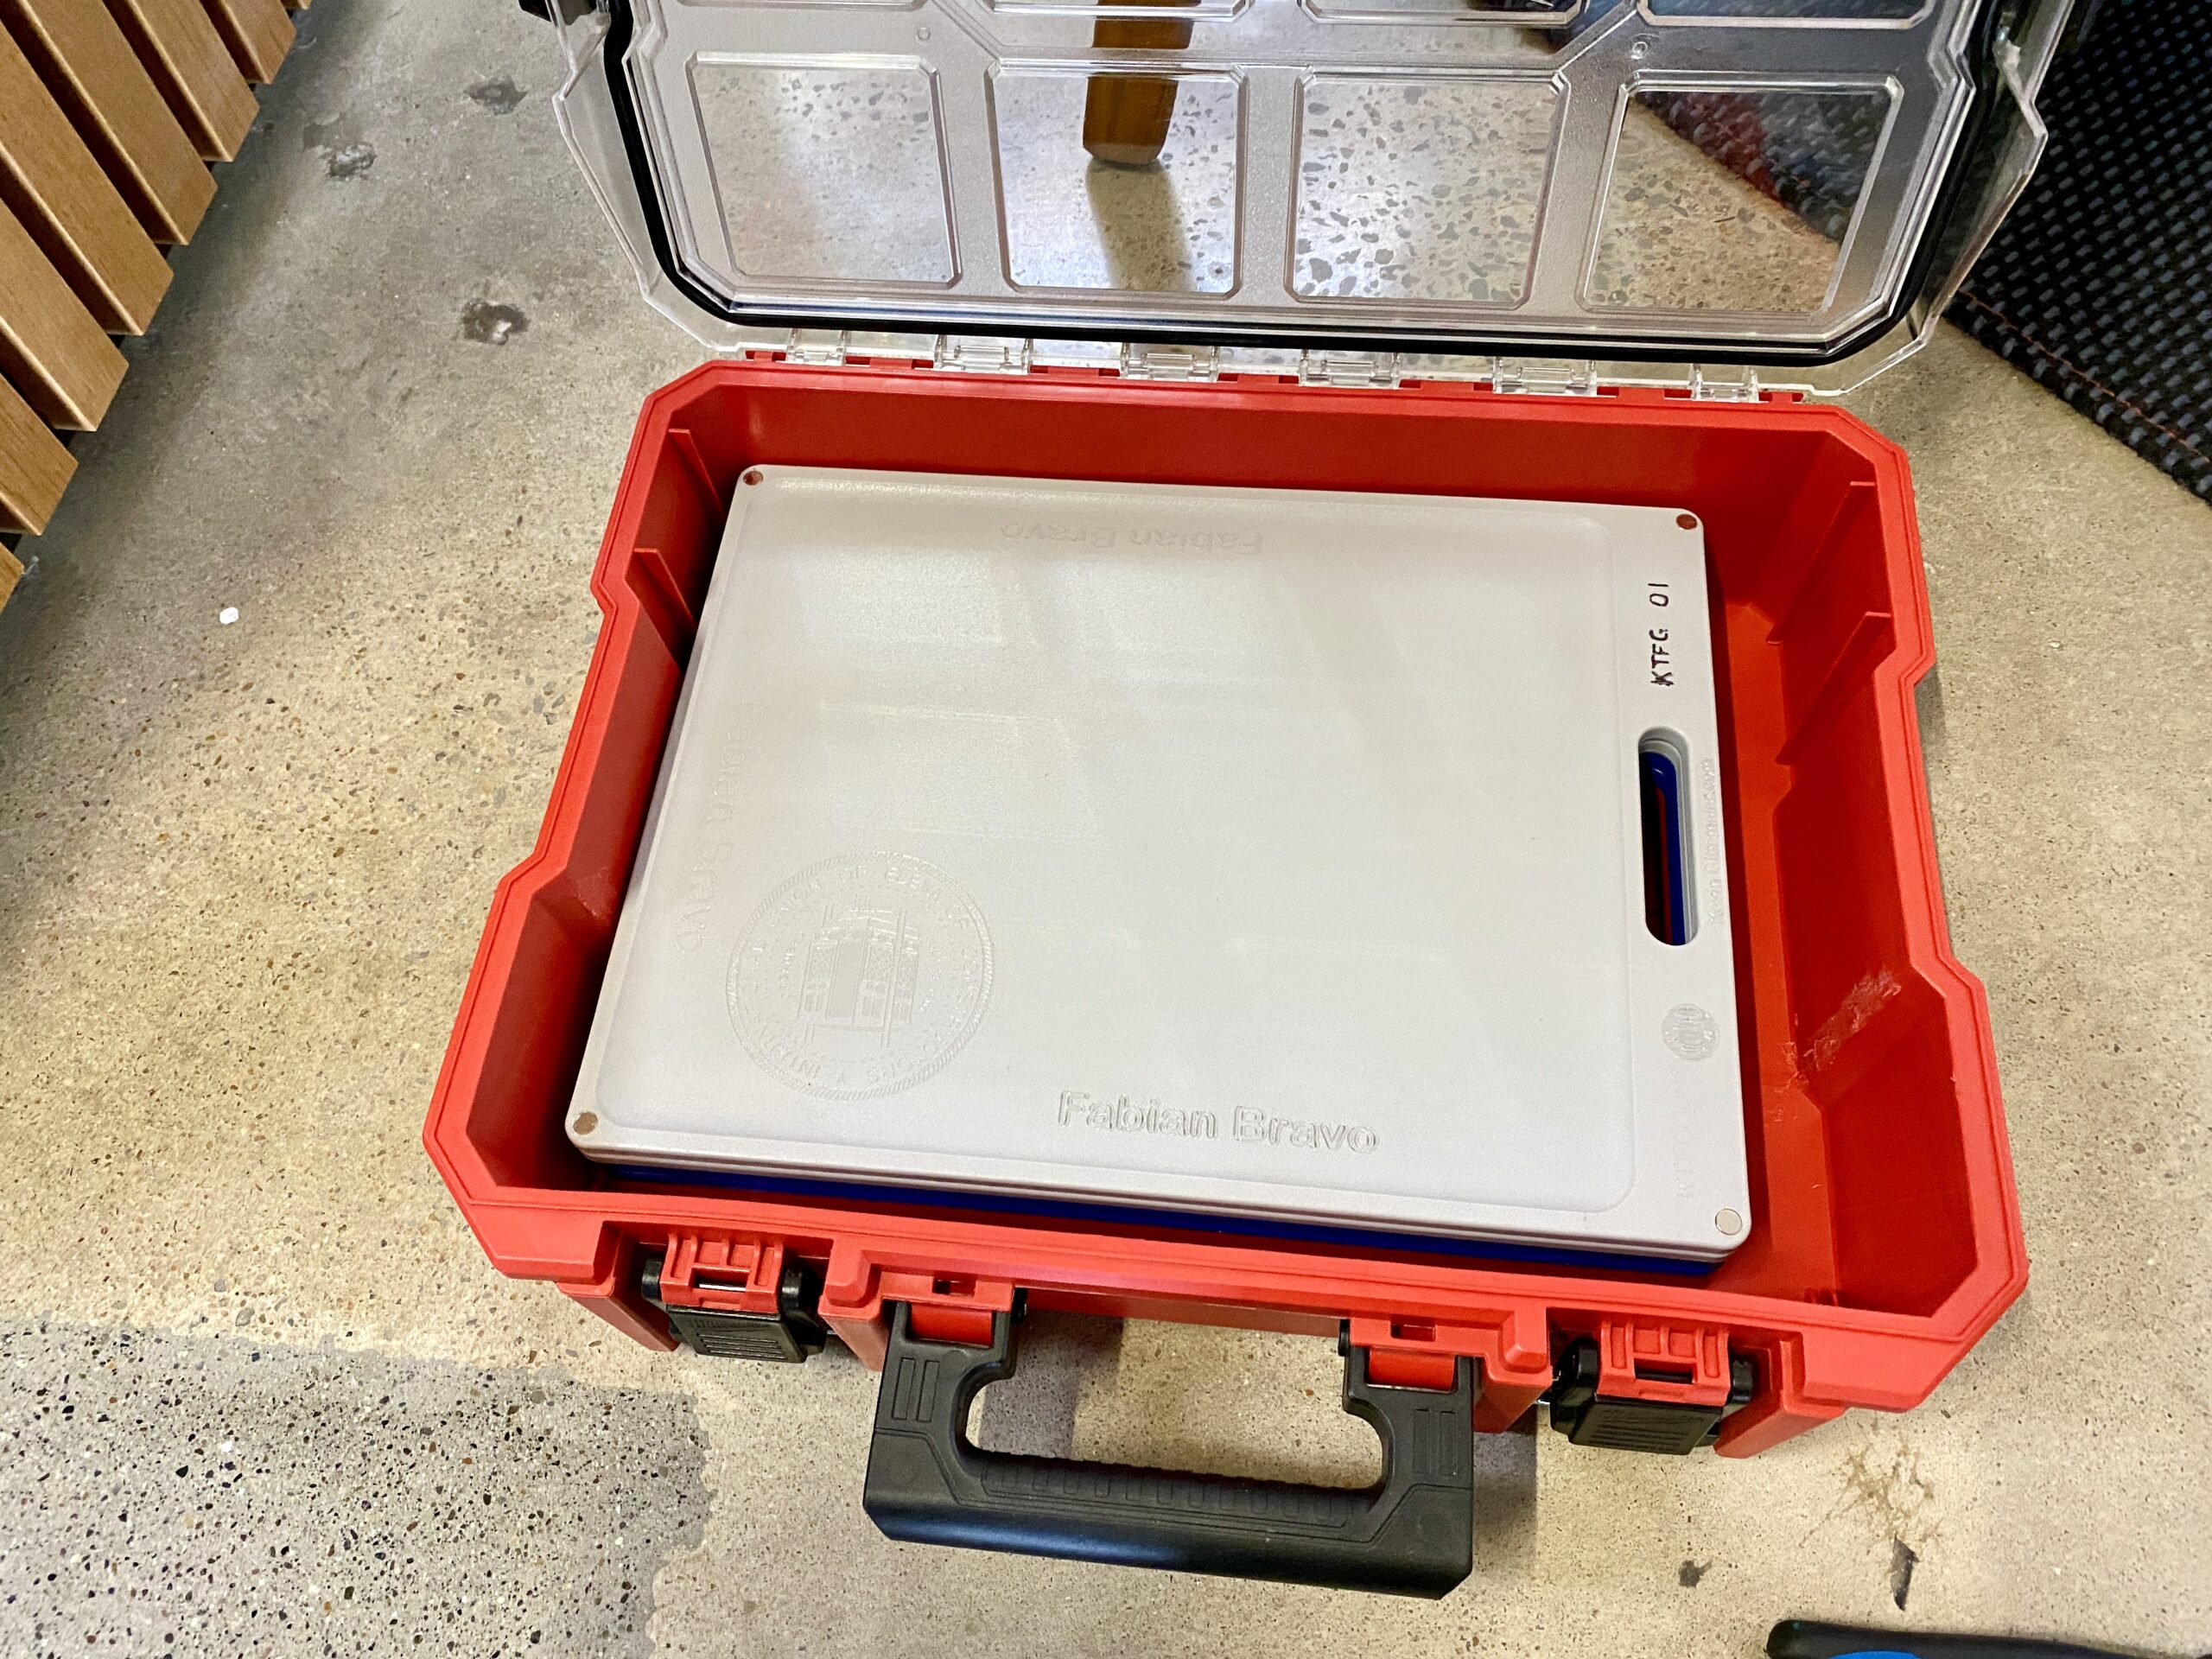
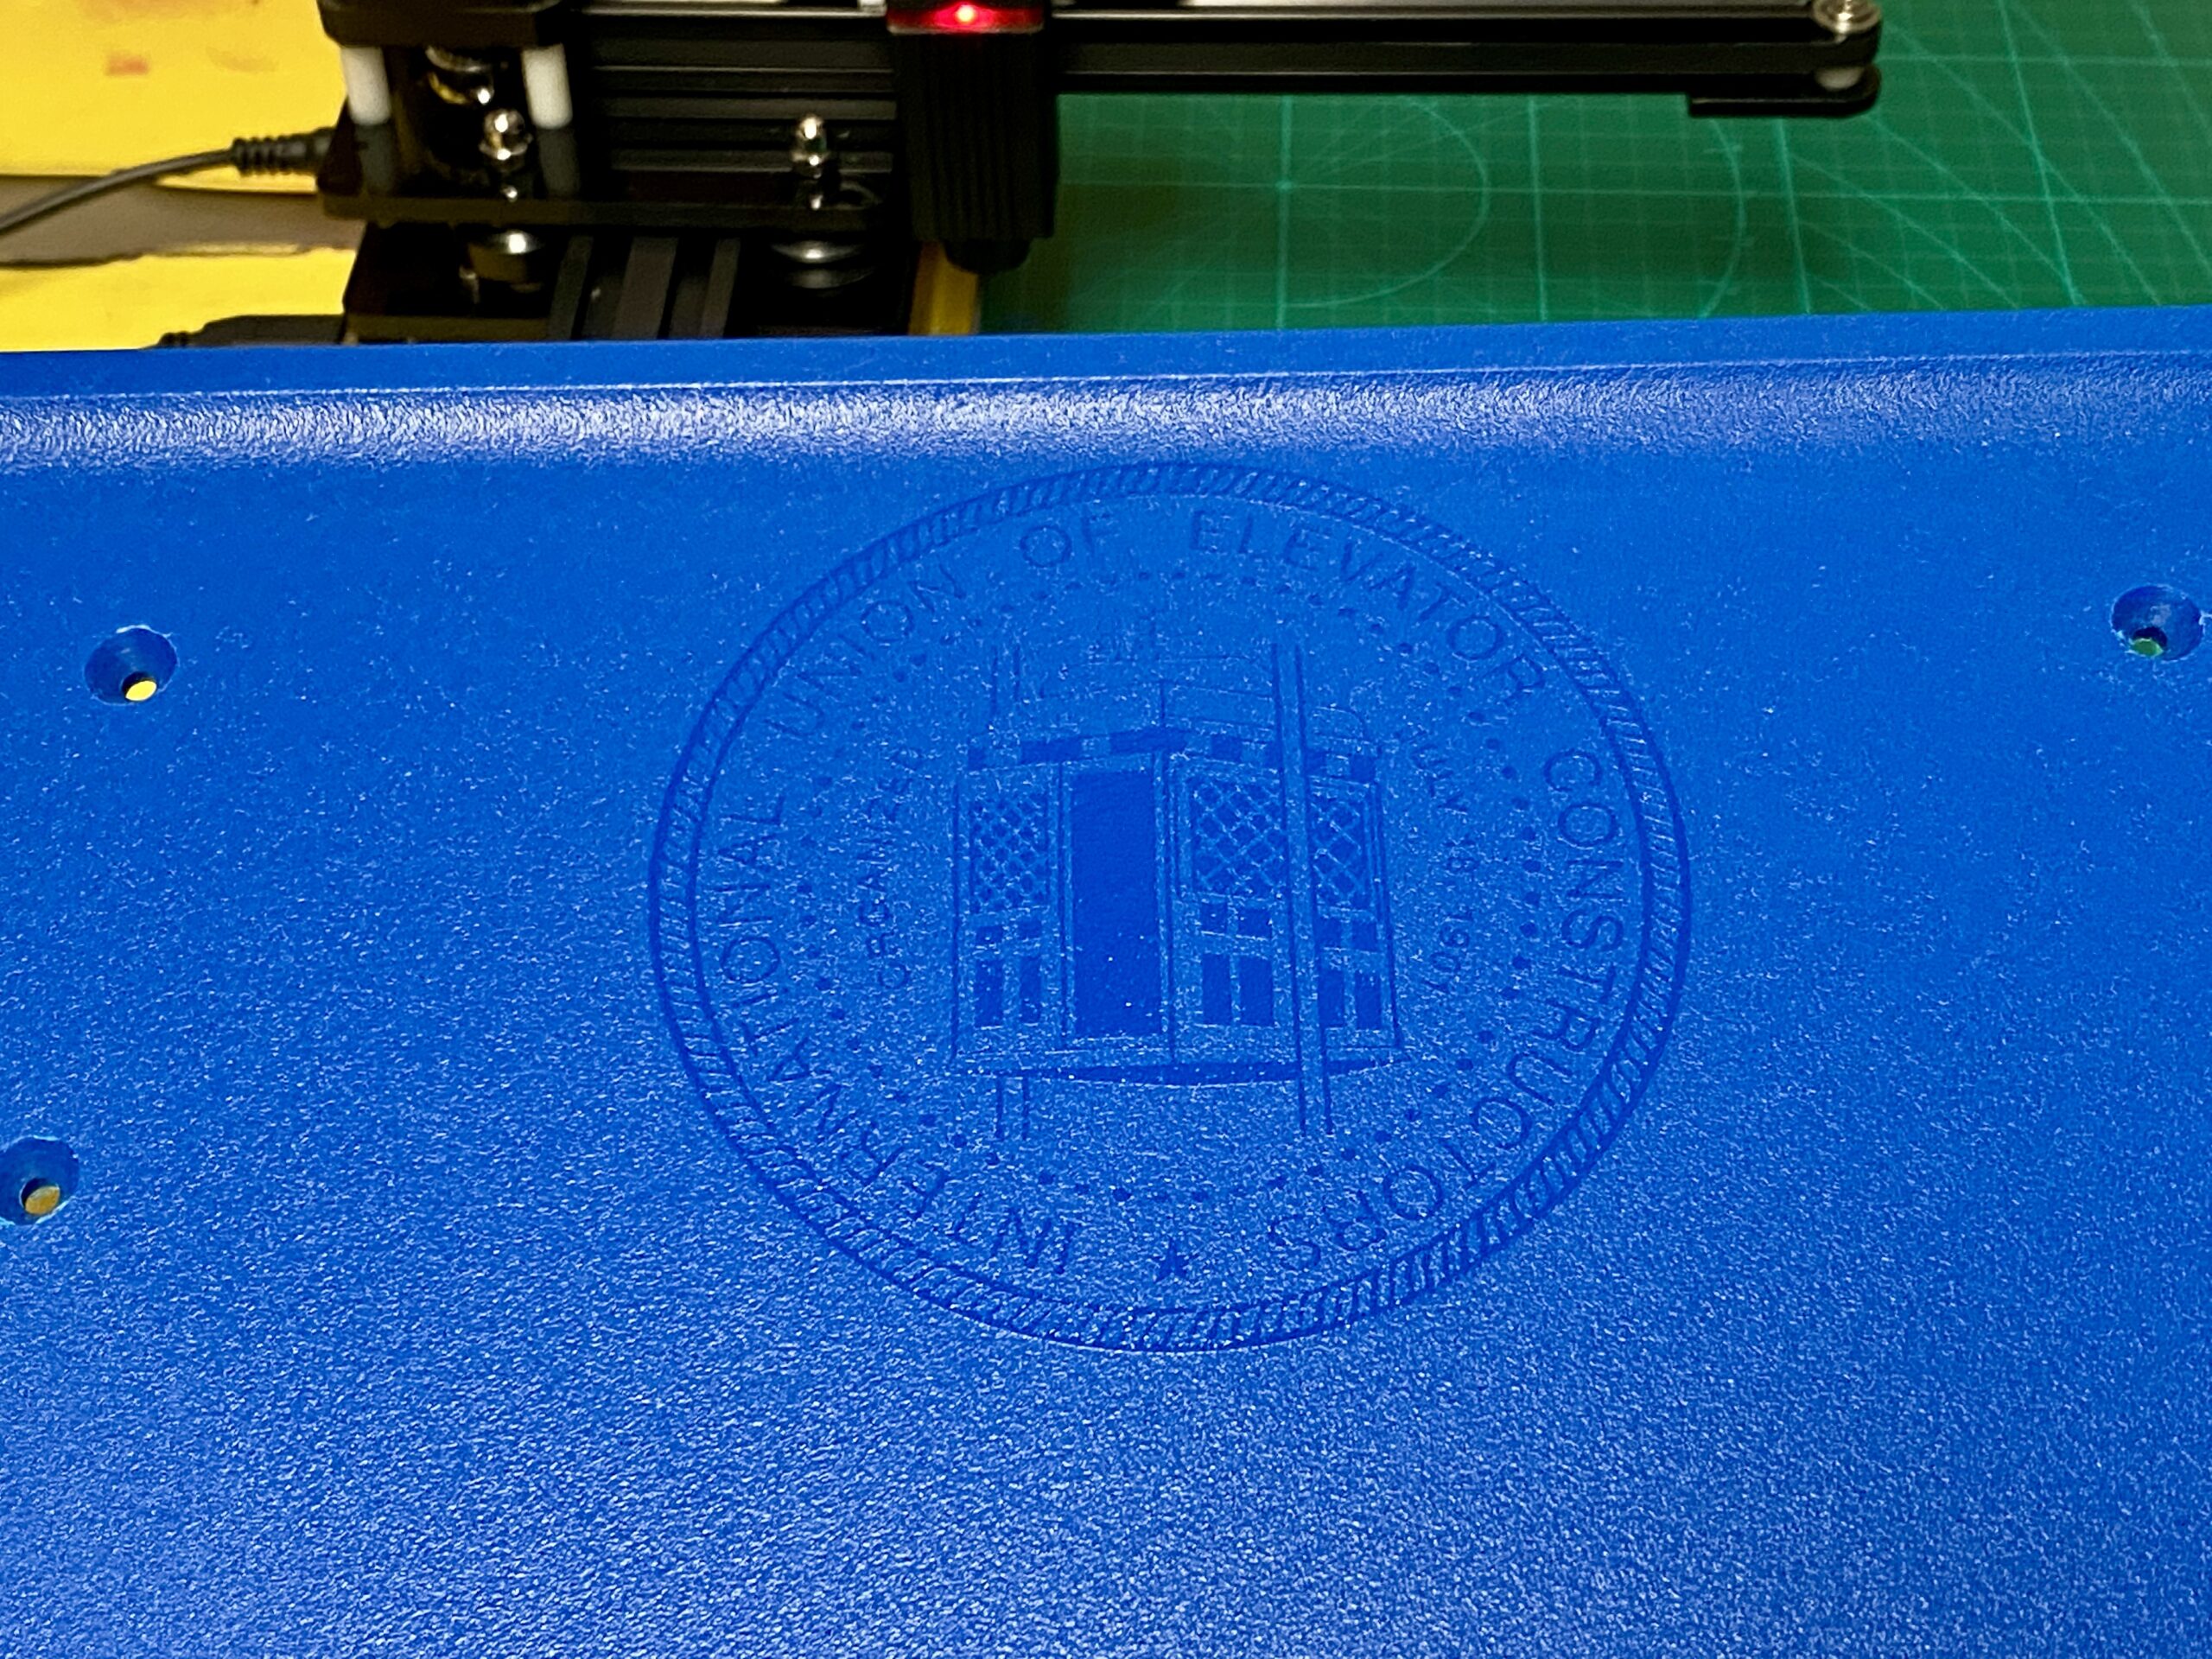
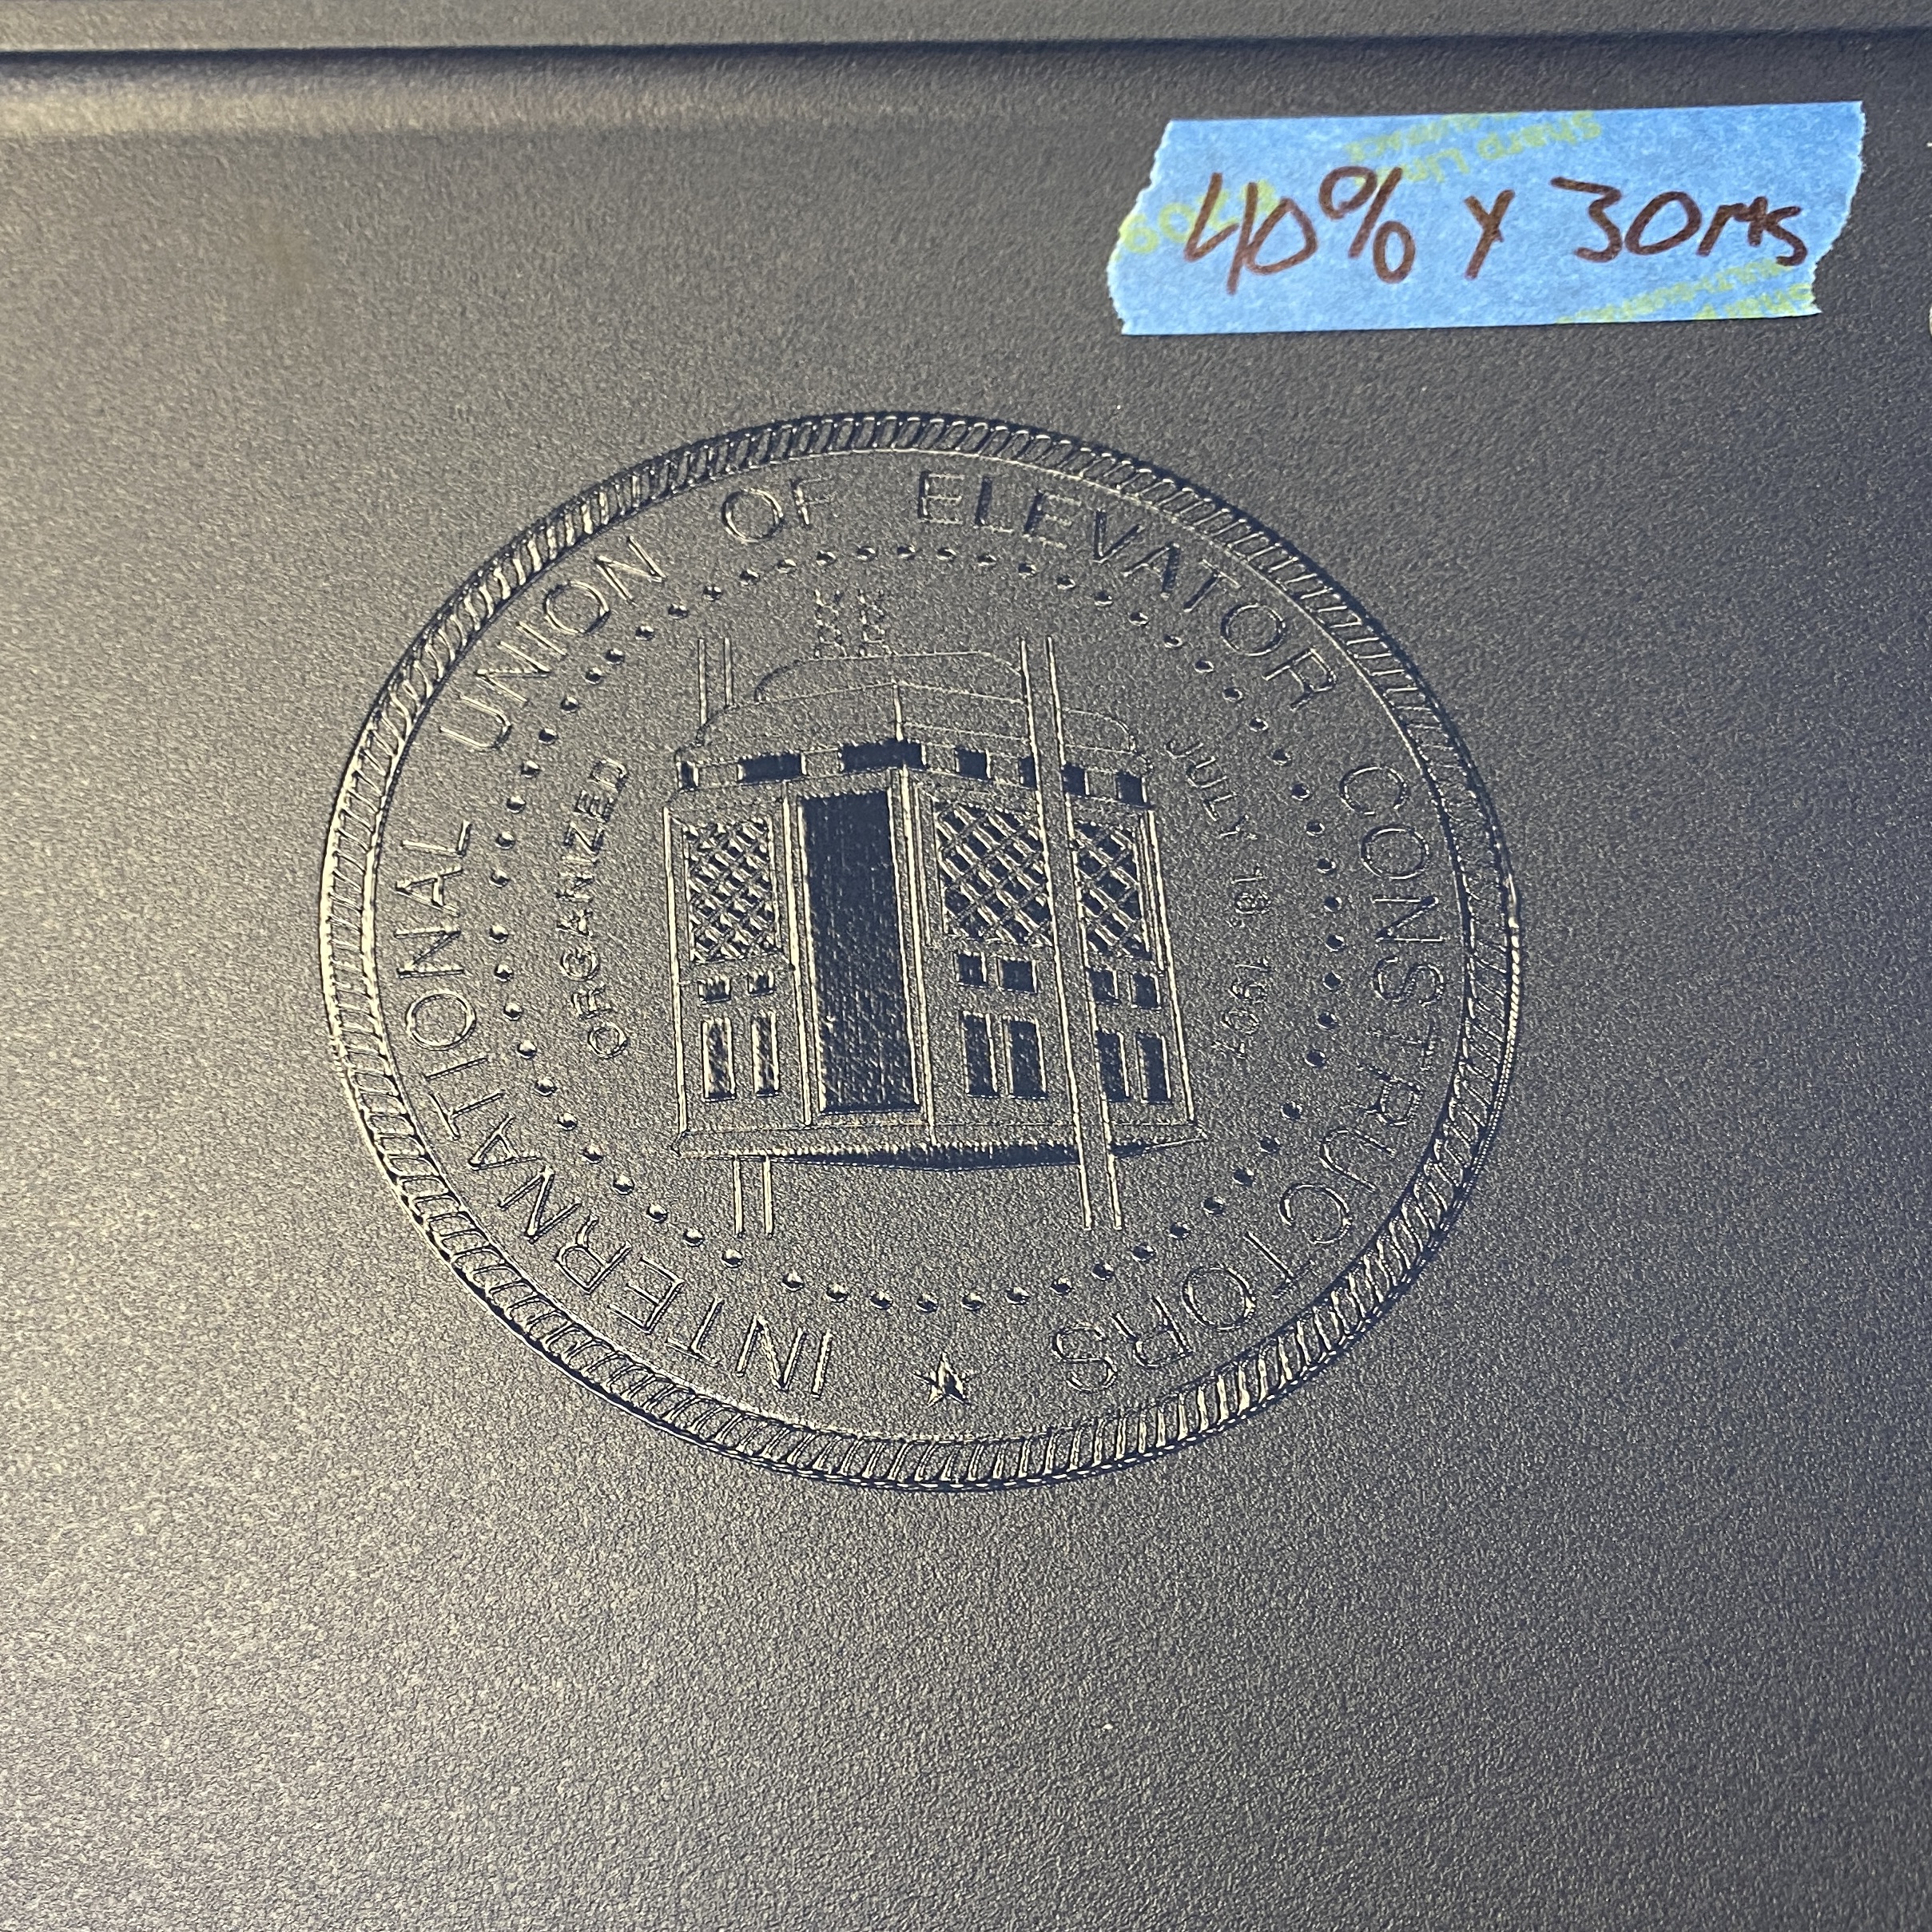
Fabian Bravo gets the first one (model 001) with his name and the IUEC logo laser engraved.
See more photos page 2. Edit 2022_05_22 and now 4 more.


totalElement has great customer service, the best prices on quality magnets, fast shipping and you get 10% off your purchase using my Discount Code “KTFG”.
How To video
Material List:
- 5/16″ x 5/16” Neodymium Cylinder Magnets: https://bit.ly/3L24sJY
- Dexas Cutting Boards Gray, Green, Red, Blue: https://amzn.to/3FMGUXD
- or
- Dexas Cutting Board White: https://amzn.to/3FOwsiA
Tool List:
- BOSCH 19/64 Cobalt Drill Bit: https://amzn.to/3sCXnZg
- or
- DWD29J-CO-PC 29pc Drill Bit Set Round Case: https://amzn.to/38tOeLB
- or
- DEWALT Drill Bit Set 29pc (w 19/64): https://amzn.to/3MeHhNe
- BOSCH CST1 1/2” Countersink: https://amzn.to/3NdyHOS
- Gedore Spanner 10” w/ Grip Covers: https://amzn.to/37KyaVx
- or
- KNIPEX Tools Pliers Wrench 10-Inch: https://amzn.to/3LjToqJ
- Milwaukee M12 Drill Driver/Impact Kit: https://amzn.to/3MhI7IO
- or
- Ryobi DP103L 10 in. Drill Press: https://amzn.to/3a2nLFp
- NEJE Master 2 Mini Laser Engraver: https://amzn.to/3Lg2e9d
Overview of Material Choice
Boards
After researching all sorts of board options, I found cutting boards to be the simplest and best option considering cost, availability and durability. I specifically like the Mainstays & Dexas Poly boards (Dexas makes mainstays for Walmart) for the somewhat pliable Poly material (it’s not supper hard and brittle), the recess on one side and the handle. I also use these as panels to mount electronics (bread board) and for my DIY Portable Magnetic Folding Shelf: https://www.kevingittemeier.com/magnetic-shelf-v2/
Sneak peak at start of video of boards used to mount PLC fault finder, Power Block etc. here
If you want a board thinner, harder and without a recessed top, try the Faberware Basics Plastic 11″ x 14″: https://amzn.to/3lzA0dZ but I don’t recommend it and you’ll need shorter magnets.
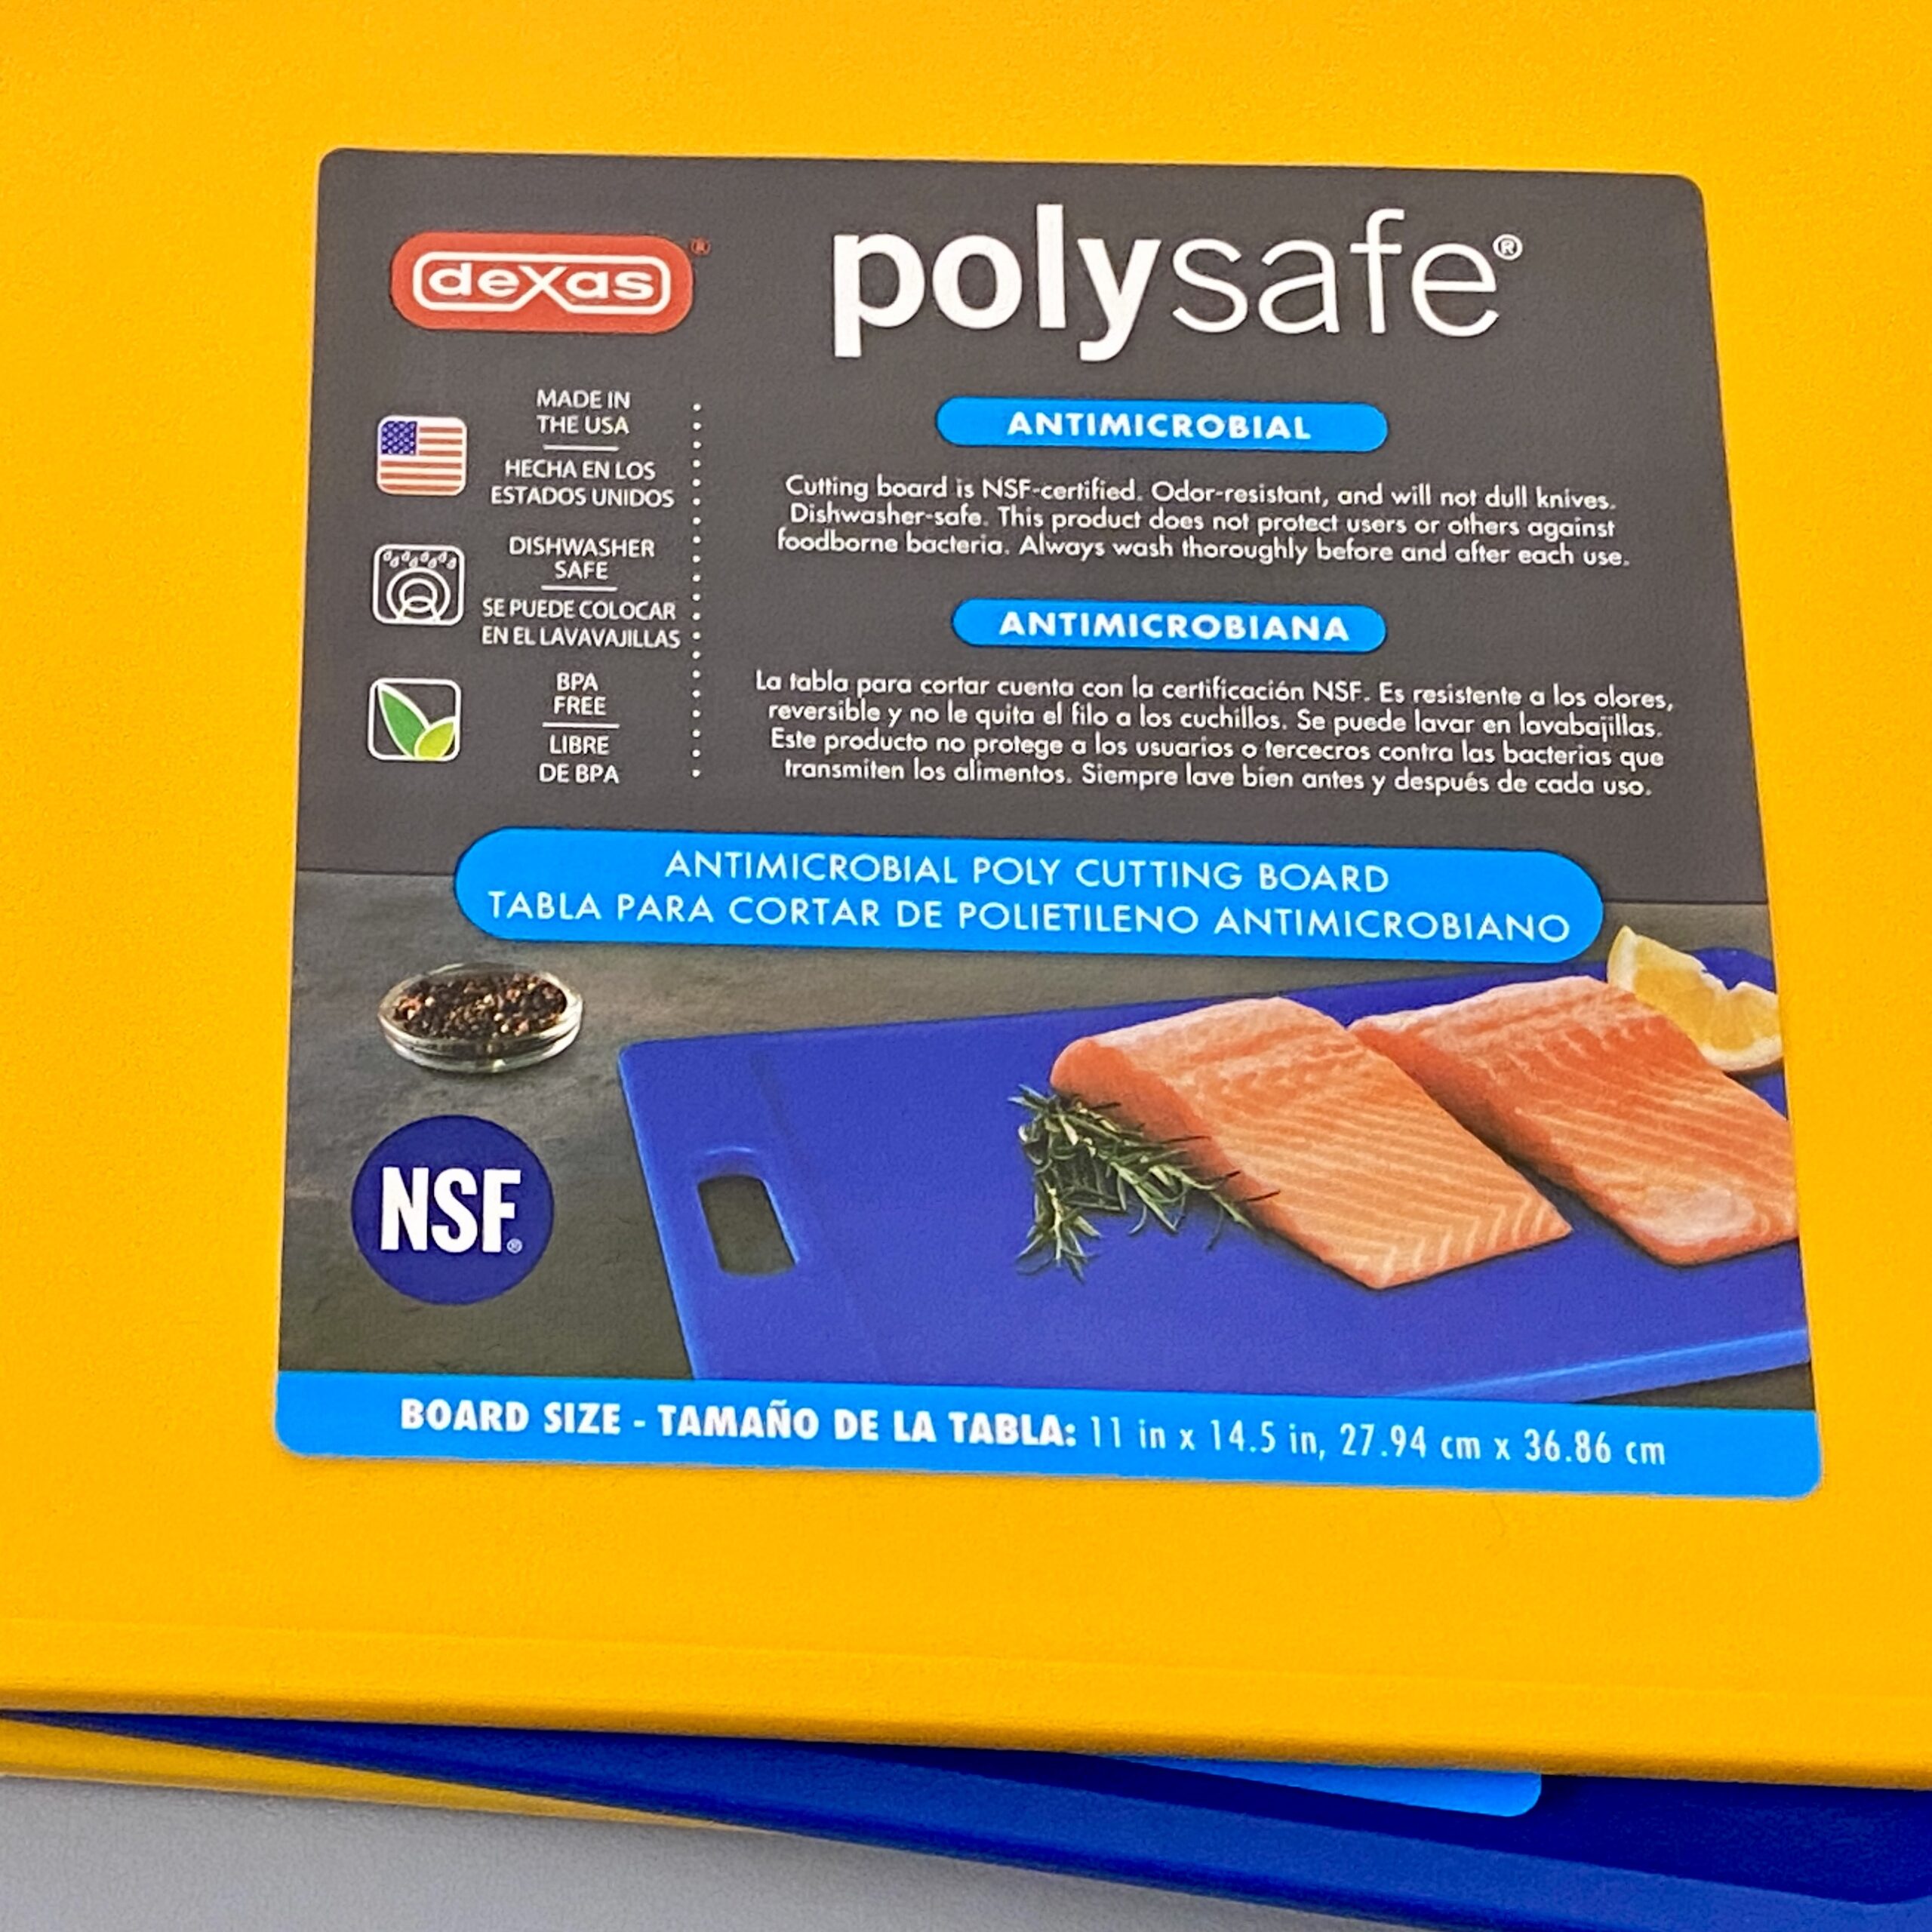
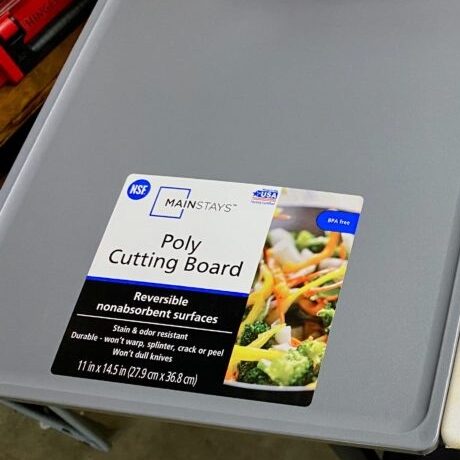
The boards I use are Mainstays (made by Dexas) and Dexas boards from Walmart. Dexas is sold on Amazon but I can’t confirm it’s the exact board I use.
Magnets
If you follow my website and YouTube channel you’re going to find yourself buying a lot of magnets. Do yourself a favor and set up an account with totalElement Magnets. They are based here in the US, have high quality high strength magnets, fast free shipping orders over $10 and great customer service. You also get 10% off your order using my Discount Code “KTFG”.
The price break when getting a quantity of 5 then taking an additional 10% off with my discount makes this a great value for quality magnets. Even if you don’t think you need 5 packs, trust me you will. You will use them!
These exact 5/16 x 5/16 N48 cylinder magnets work perfect with the Mainstays/Dexas boards because they are just short the thickness of the board so they are slightly recessed in the board on each side. This will prevent them from shattering due to repeated impact on metal.

Lets get started
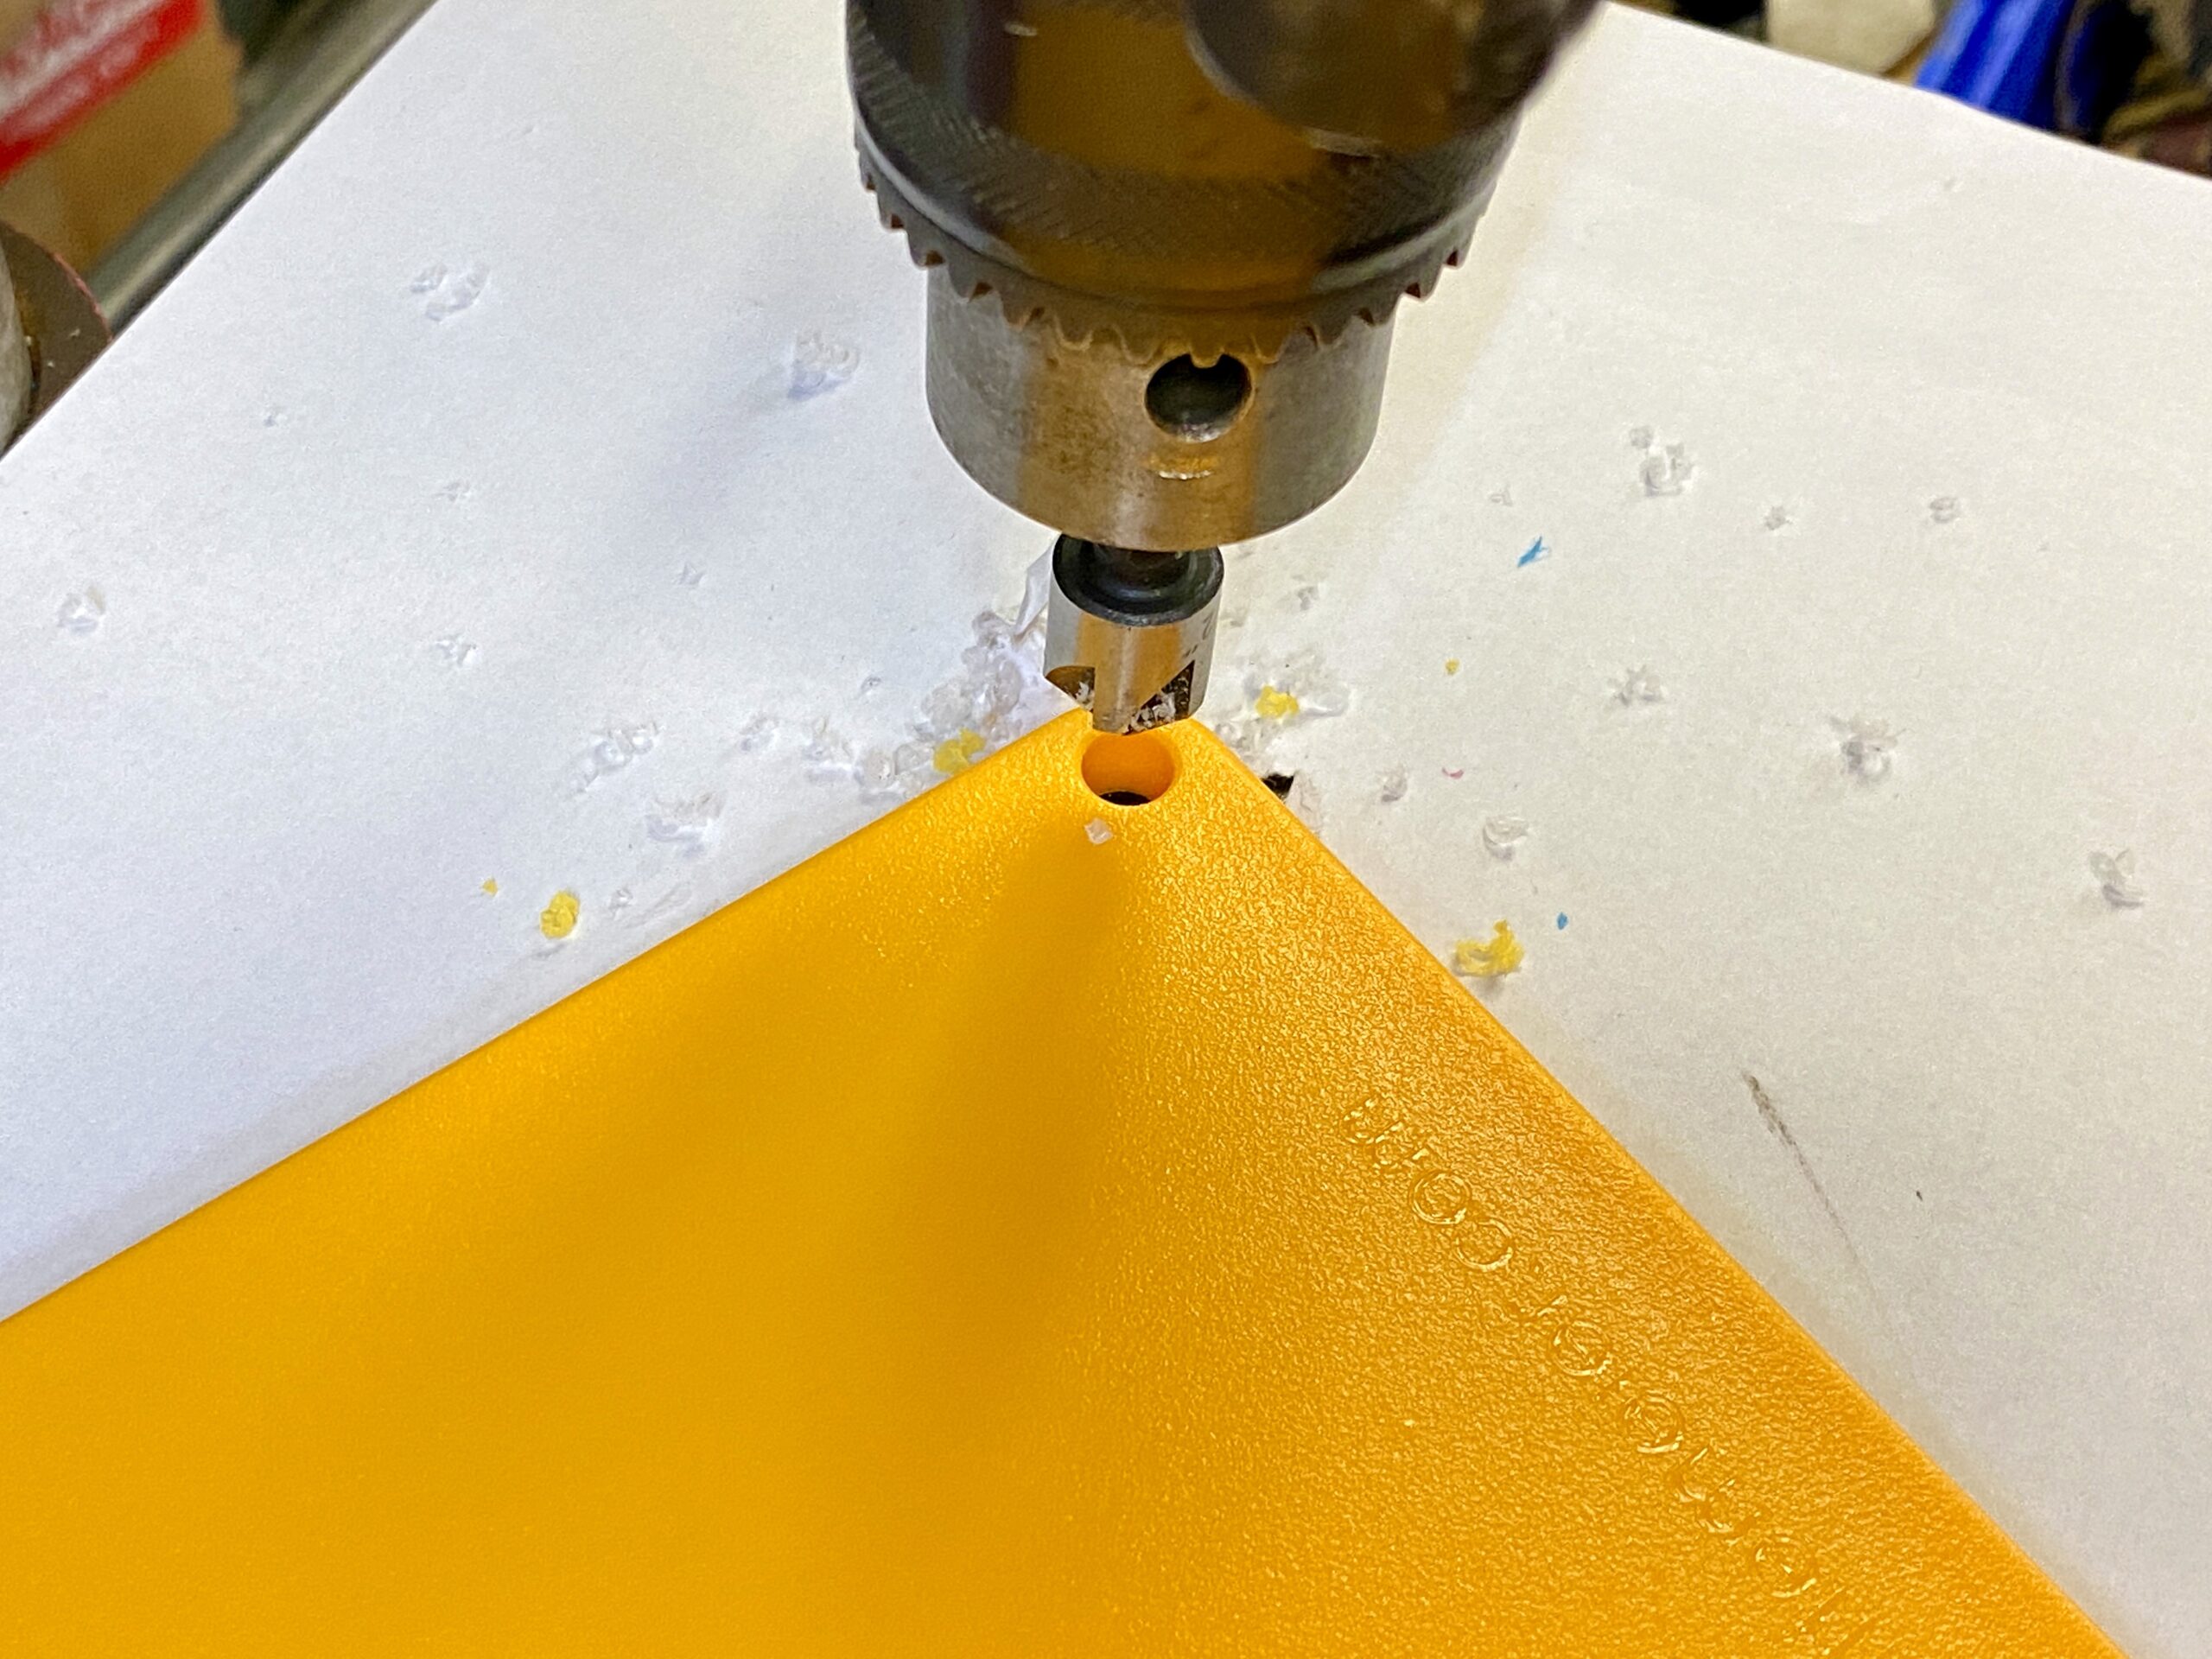
Step 1:
Drill & Countersink

What good fortune!
The Mainstays/Dexas Boards have round mold impressions in all 4 corners exactly were we need to drill a 19/64″ hole.
Q – Why 19/64 hole for 5/16 magnet?
A – Because we are going to press fit, no need for glue.
It’s best to use a drill press so the hole is perfectly straight but if you’re talented you can do so will a handheld drill. Run the drill up and down a few times to open it a bit if you find the hole is too tight.


Now we need to use a countersink bit to barely taper the edge on one side. This can be done easily with a press or handheld drill.
Q – Why taper one side?
A – So the press fit starts easier. It’s not absolutely necessary but do it.


Step 2
Embed the Magnets
It’s hammer time?!?
No, no it’s not hammer time. Put the hammer away Andrew – who embodies “He who is good with a hammer sees everything as a nail.” More quotes here
We are going to press fit the magnets using an expensive but super useful tool, a Pliers Wrench. Trust me when I tell you that you want to own one of these! The Amount of tasks made possible or easier with a Pliers Wrench makes it well worth the exorbitant price (if you earn at least a modest wage with your tools and chance of them getting lost or stolen is slim).

Which do I like better (Gedore or Knipex) and why?
Read more page 2
If you intend to build multiples and would like to store or transport them stacked together magnetically, it’s important to make note of polarity and match it on each build. Just make all the same poles face up on each one you build. Example: all North poles face up on the recessed side, you know, because of maps. Post on DIY magnetic pole detector here


Once you have established the polarity, adjust the jaws properly and stick the magnet to a jaw. Start pressing in from the tapered countersunk side. The parallel jaws of the Pliers Wrench will perfectly press the magnet in flat.


Now the magnet will be flush on one side but recessed on the other. We want to split the difference so the magnet is just slightly recessed on each side. To do so just get a felt pad, strip of rubber or even cardboard to lay on the flush side. Now squeeze again with the Plier Wrench and the magnet will be pressed down just below flush. Now do the other 3 corners. If the hole seems just a little too tight maybe run the drill bit back and forth a few more times.
You’re all done unless you want to add SN, Names or Logos.
Optional Step 3
Laser Engraving
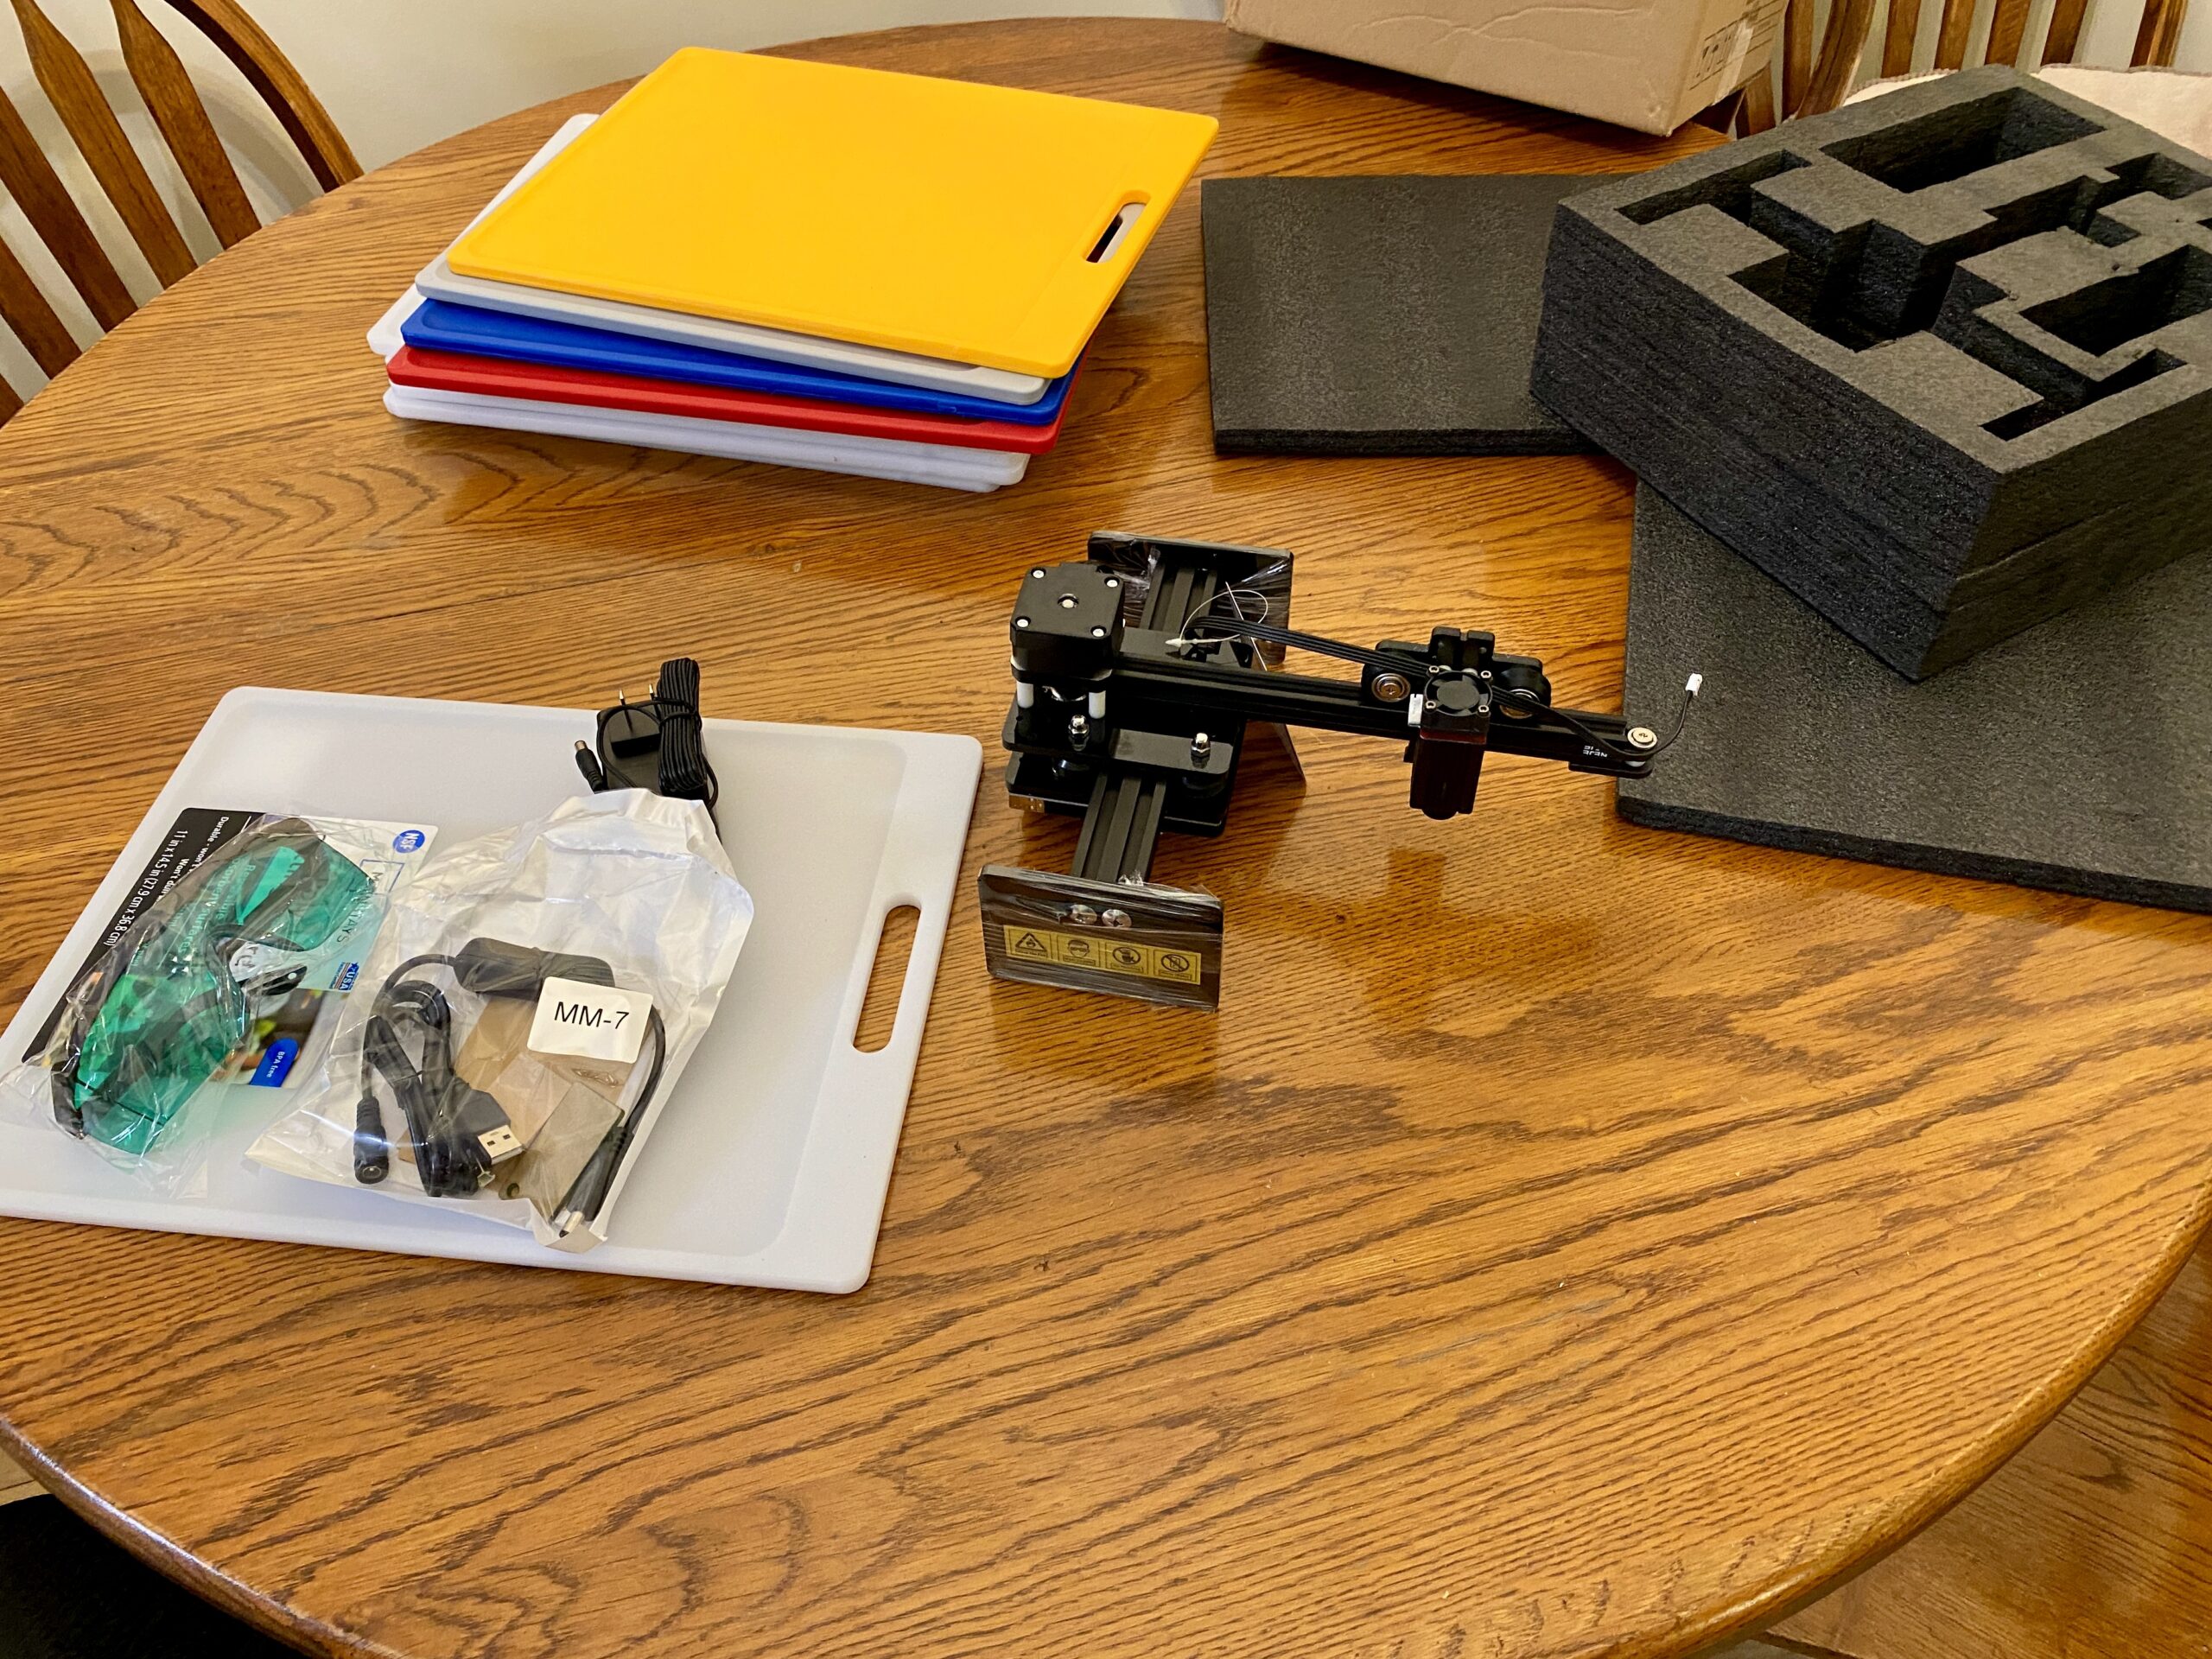


Look what came in the mail!
The NEJE Master 2 Mini Laser Engraver: https://amzn.to/3Lg2e9d
The Laser engraver wasn’t a thoroughly researched purchase, I just went with the cheapest option with good reviews. I don’t regret the purchase but if I had it to do over again I would get one a little bigger and more powerful like the NEJE Master 2S: https://amzn.to/3wde4MO for just a little more money.
Or maybe one of these more expensive models:
ORTUR laser master engraver: https://amzn.to/3NeUsOd
xTool D1 Laer Engraver: https://amzn.to/3ltnePr
It took a lot of trial and error to get satisfactory results. Initially I was a little disappointed because I had unreasonable expectations of what a diode laser engraver could do and on what material. I had hoped it would quickly burn black lettering into plastic. It won’t without the addition of a substance and it’s slow as cat $#it!
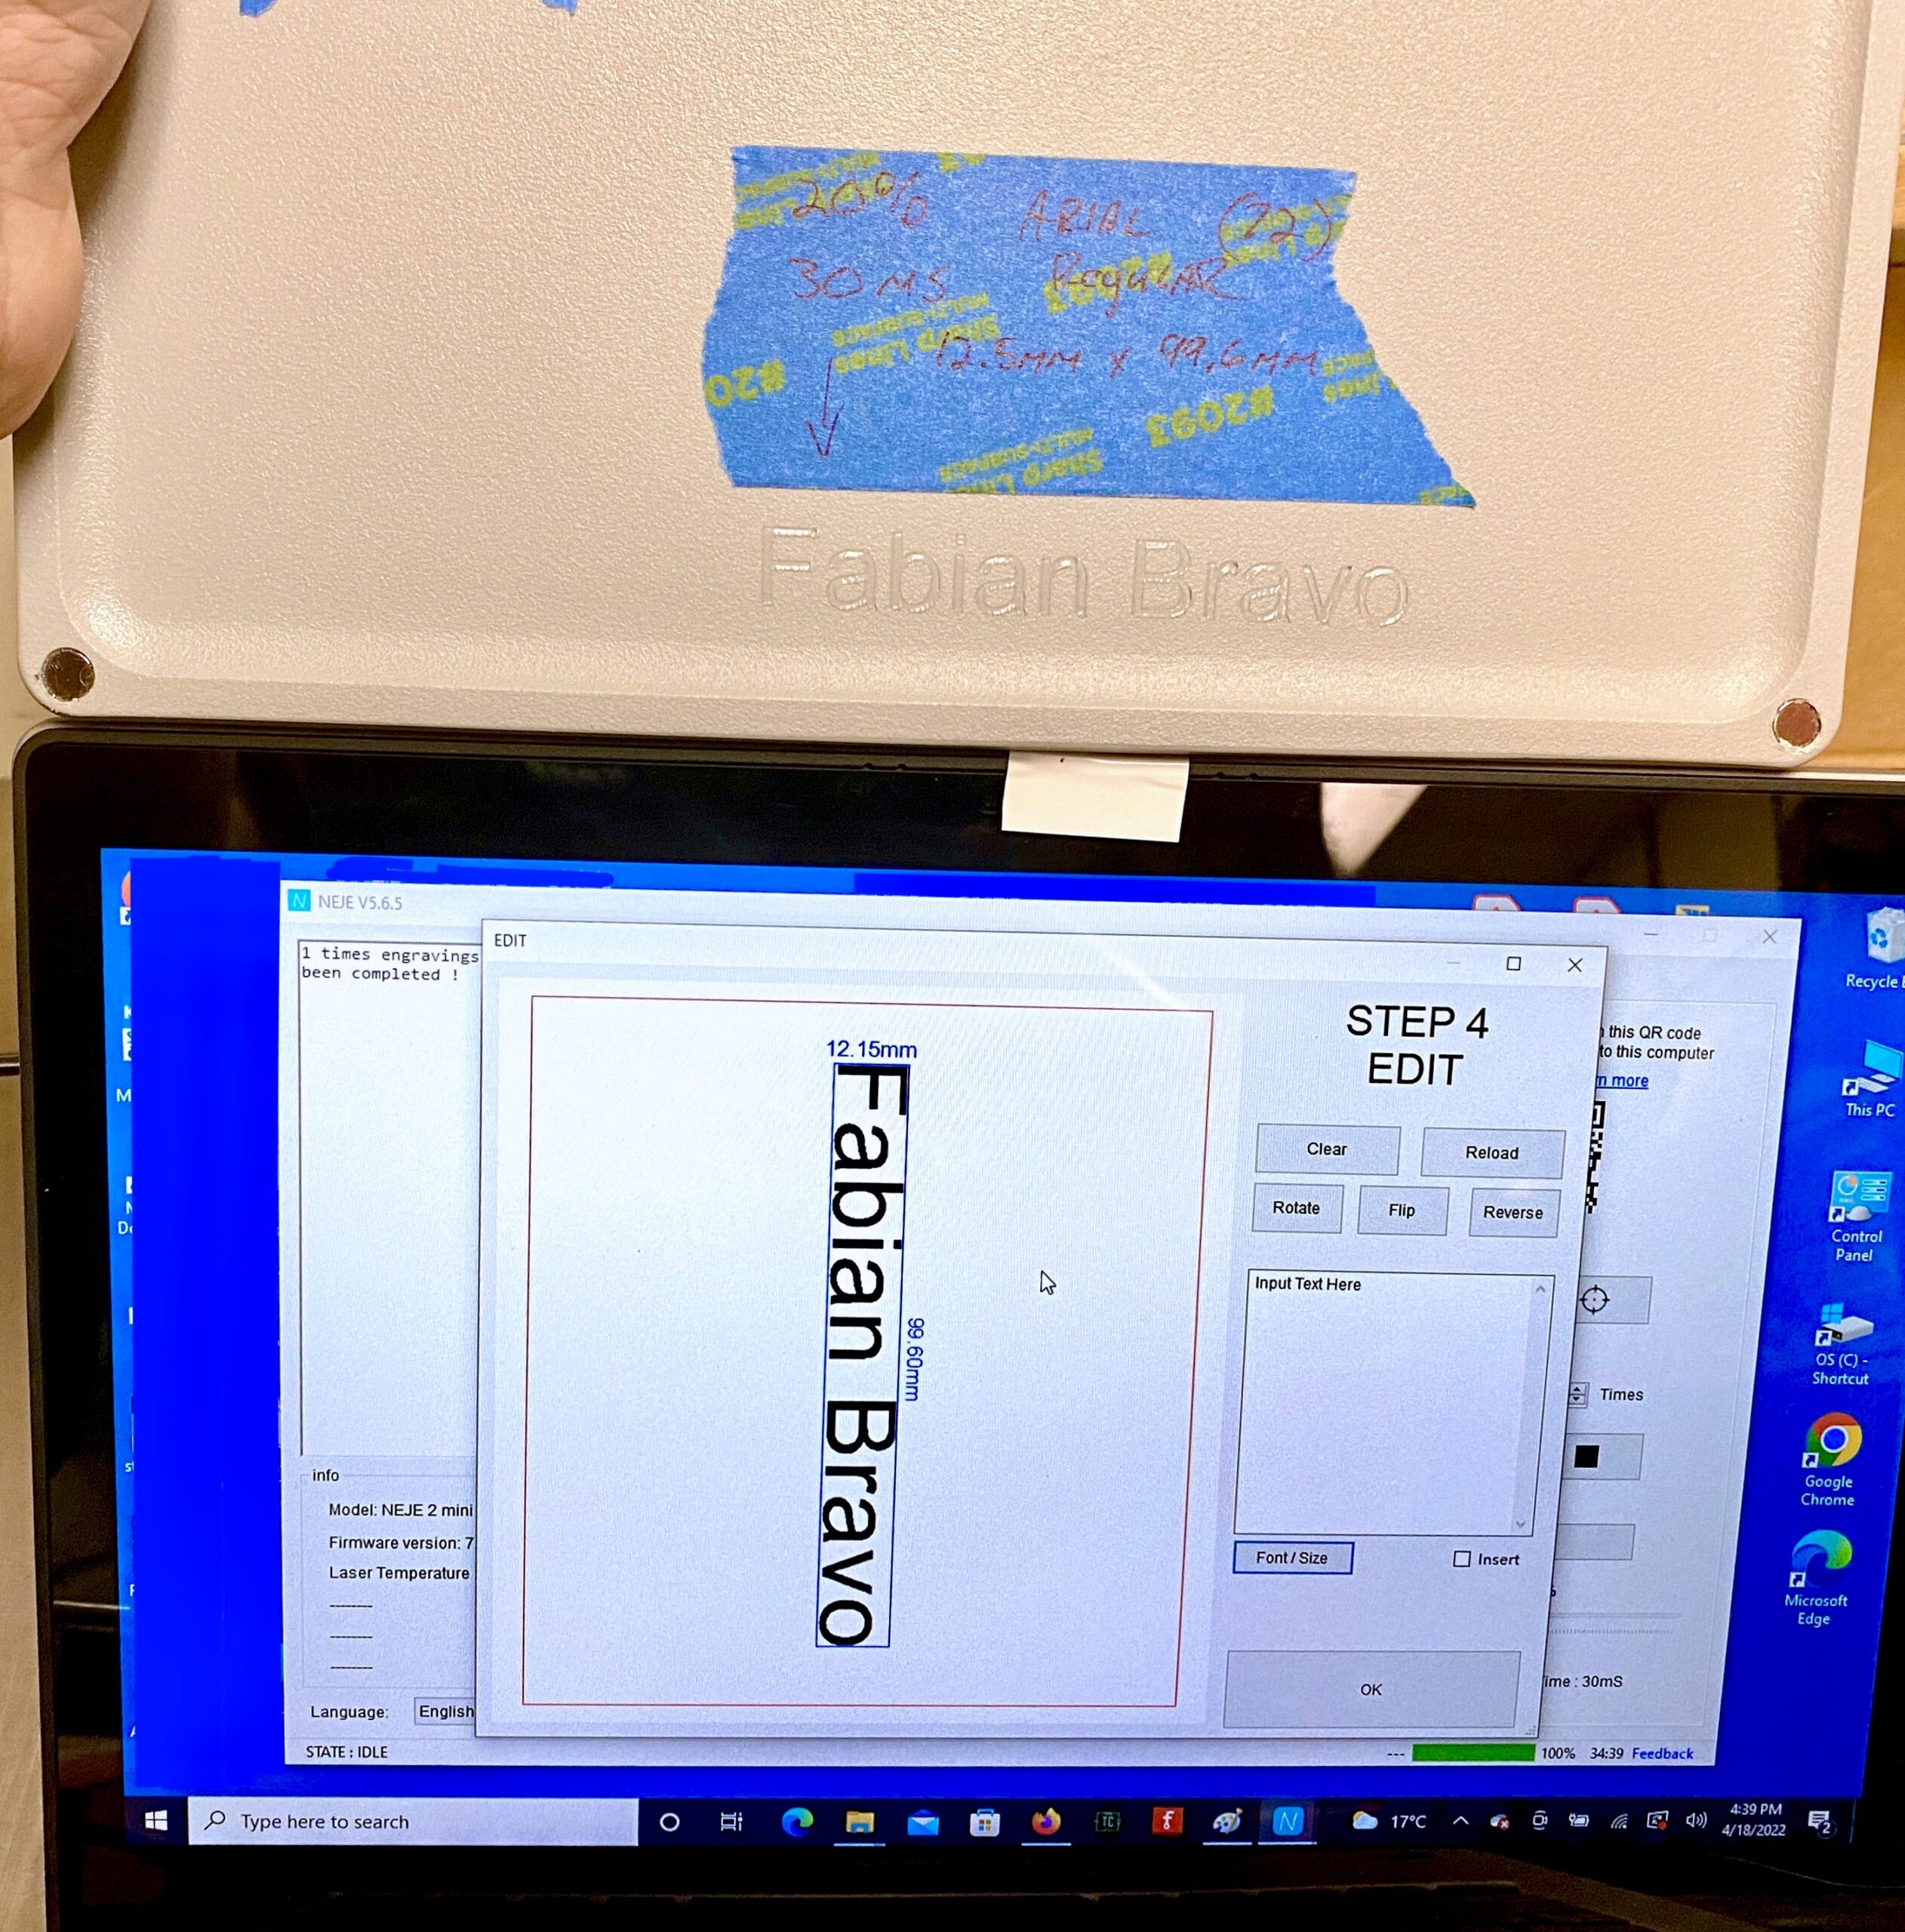
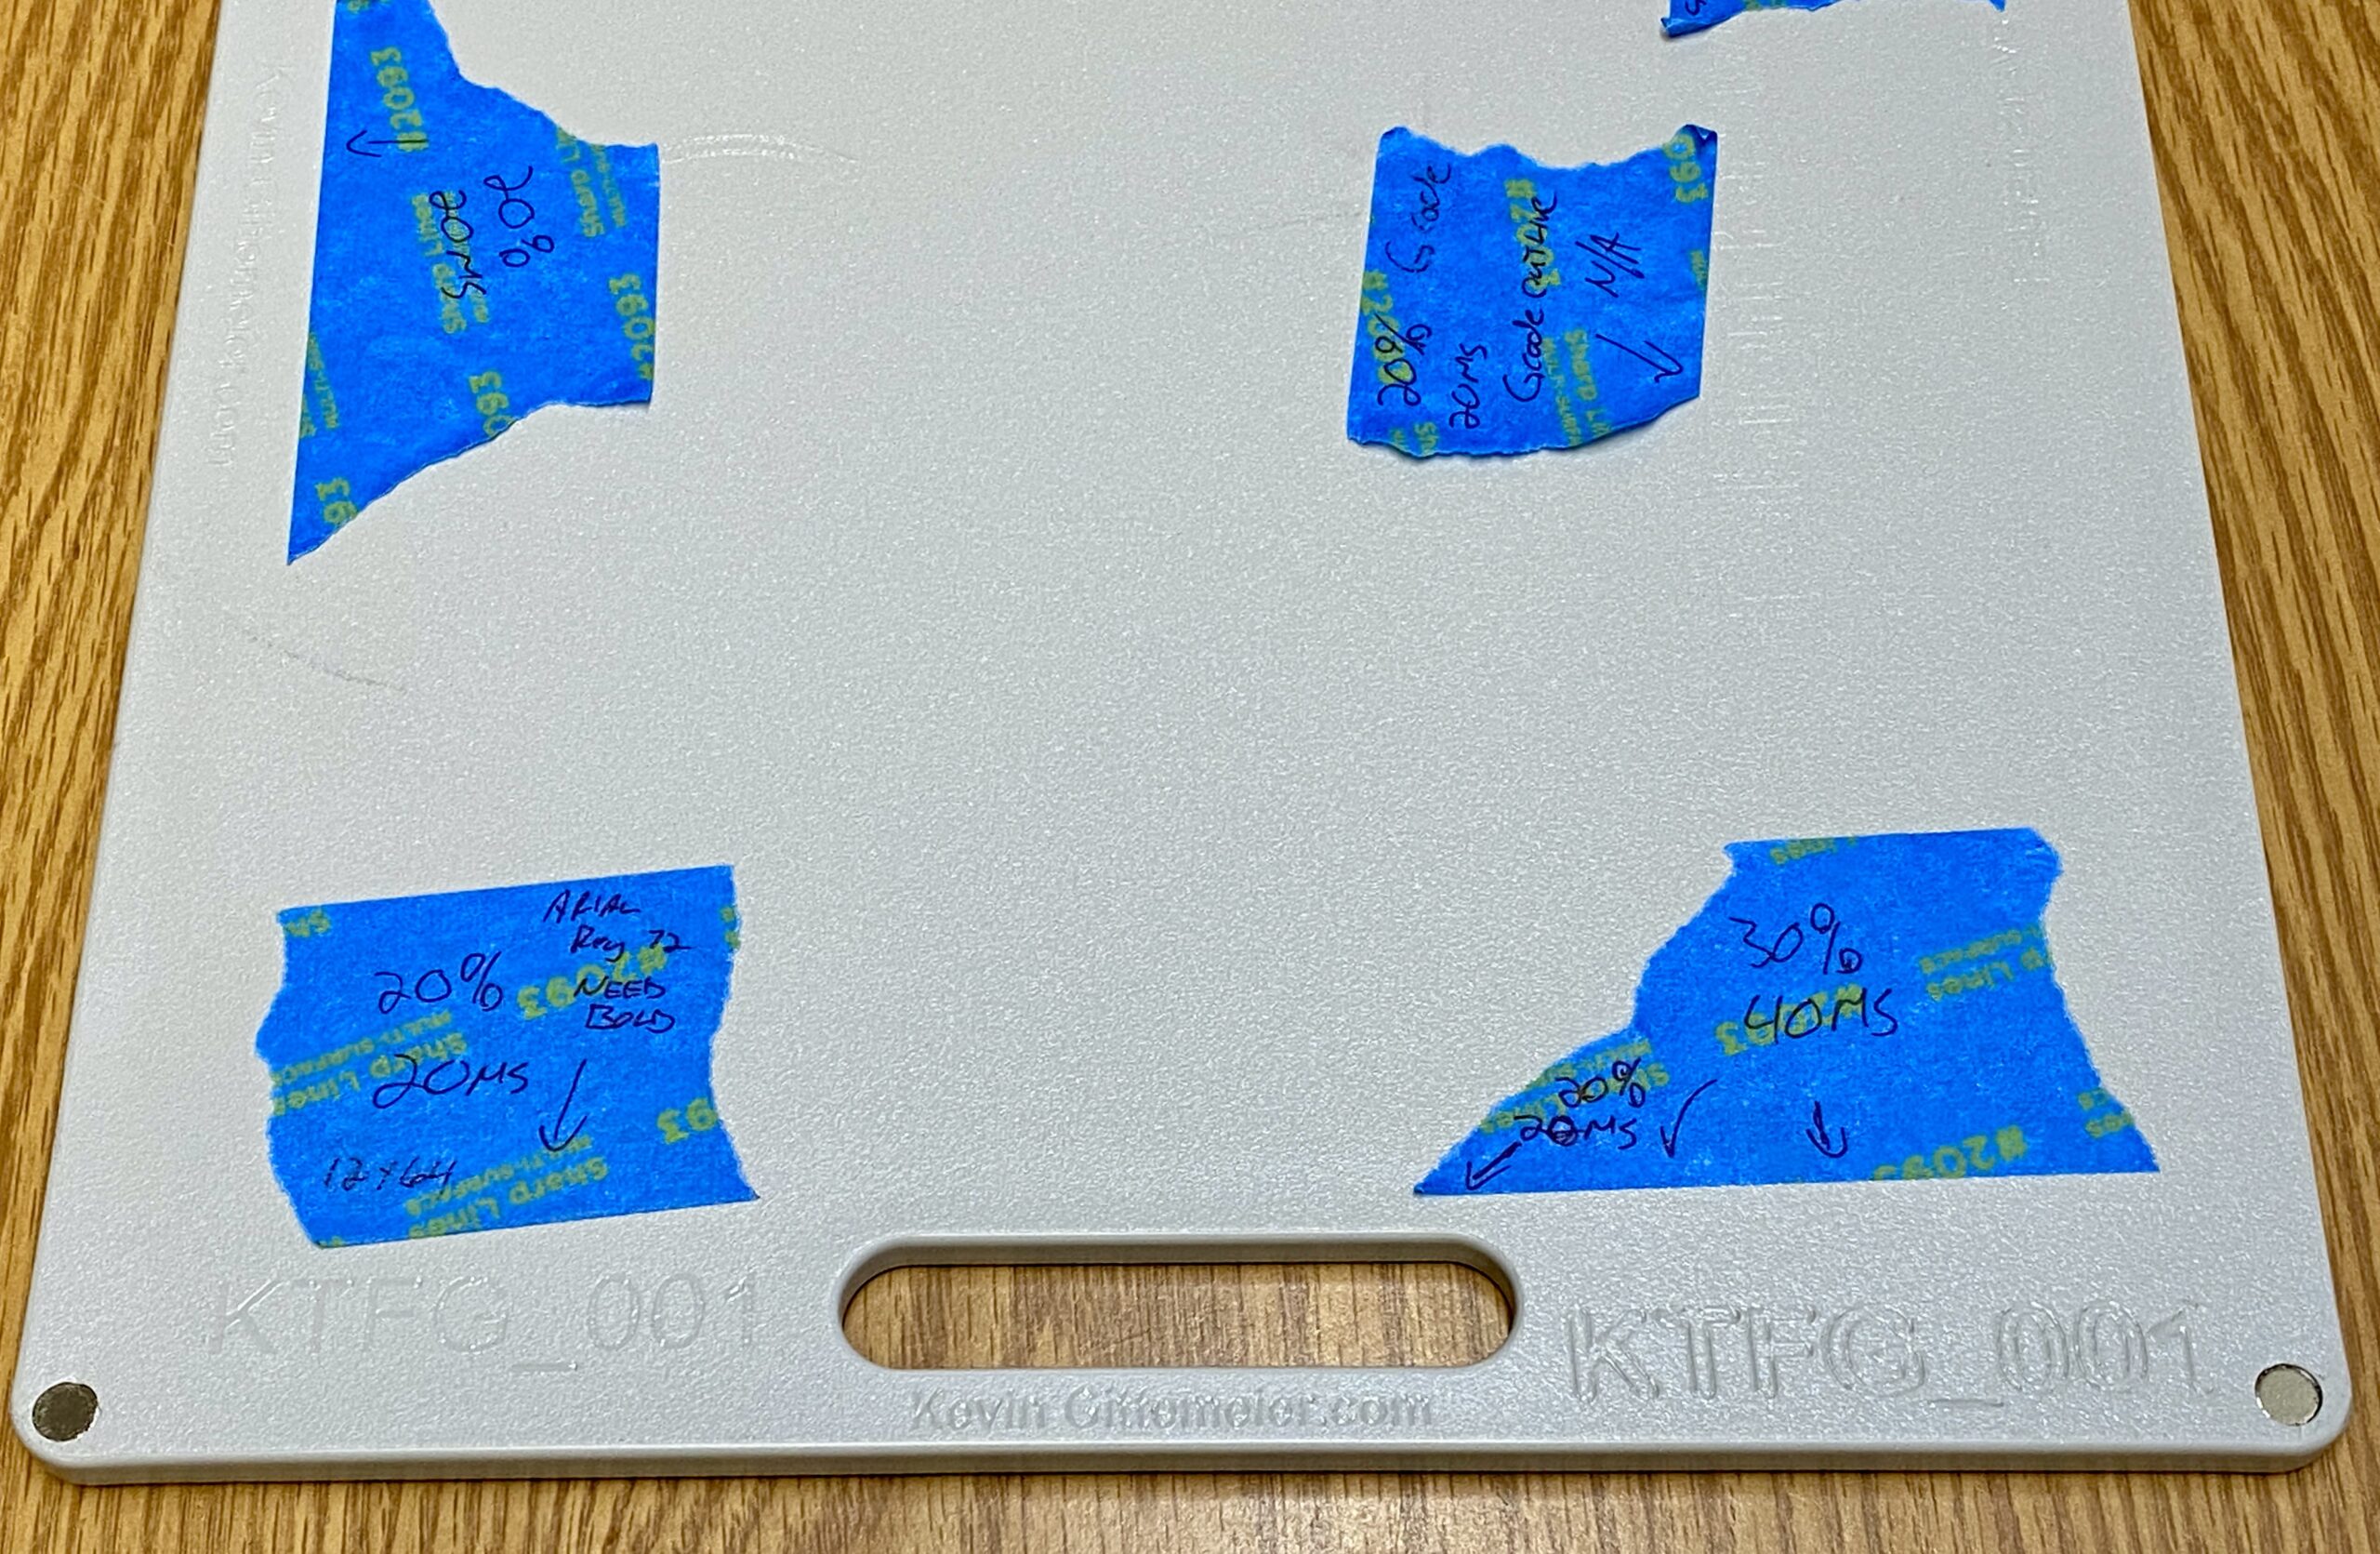
Once I came to terms with with etching result and time required for etches, my initial disappointment turned to content. I used to hand engrave serial numbers and the initials of those who purchased my builds. “Wait, do you sell these?” No & Yes, see FAQ page 2. Now I can do that and more like adding my website and logos (albeit it takes hours of burn time).

Read more on my laser engraving post here
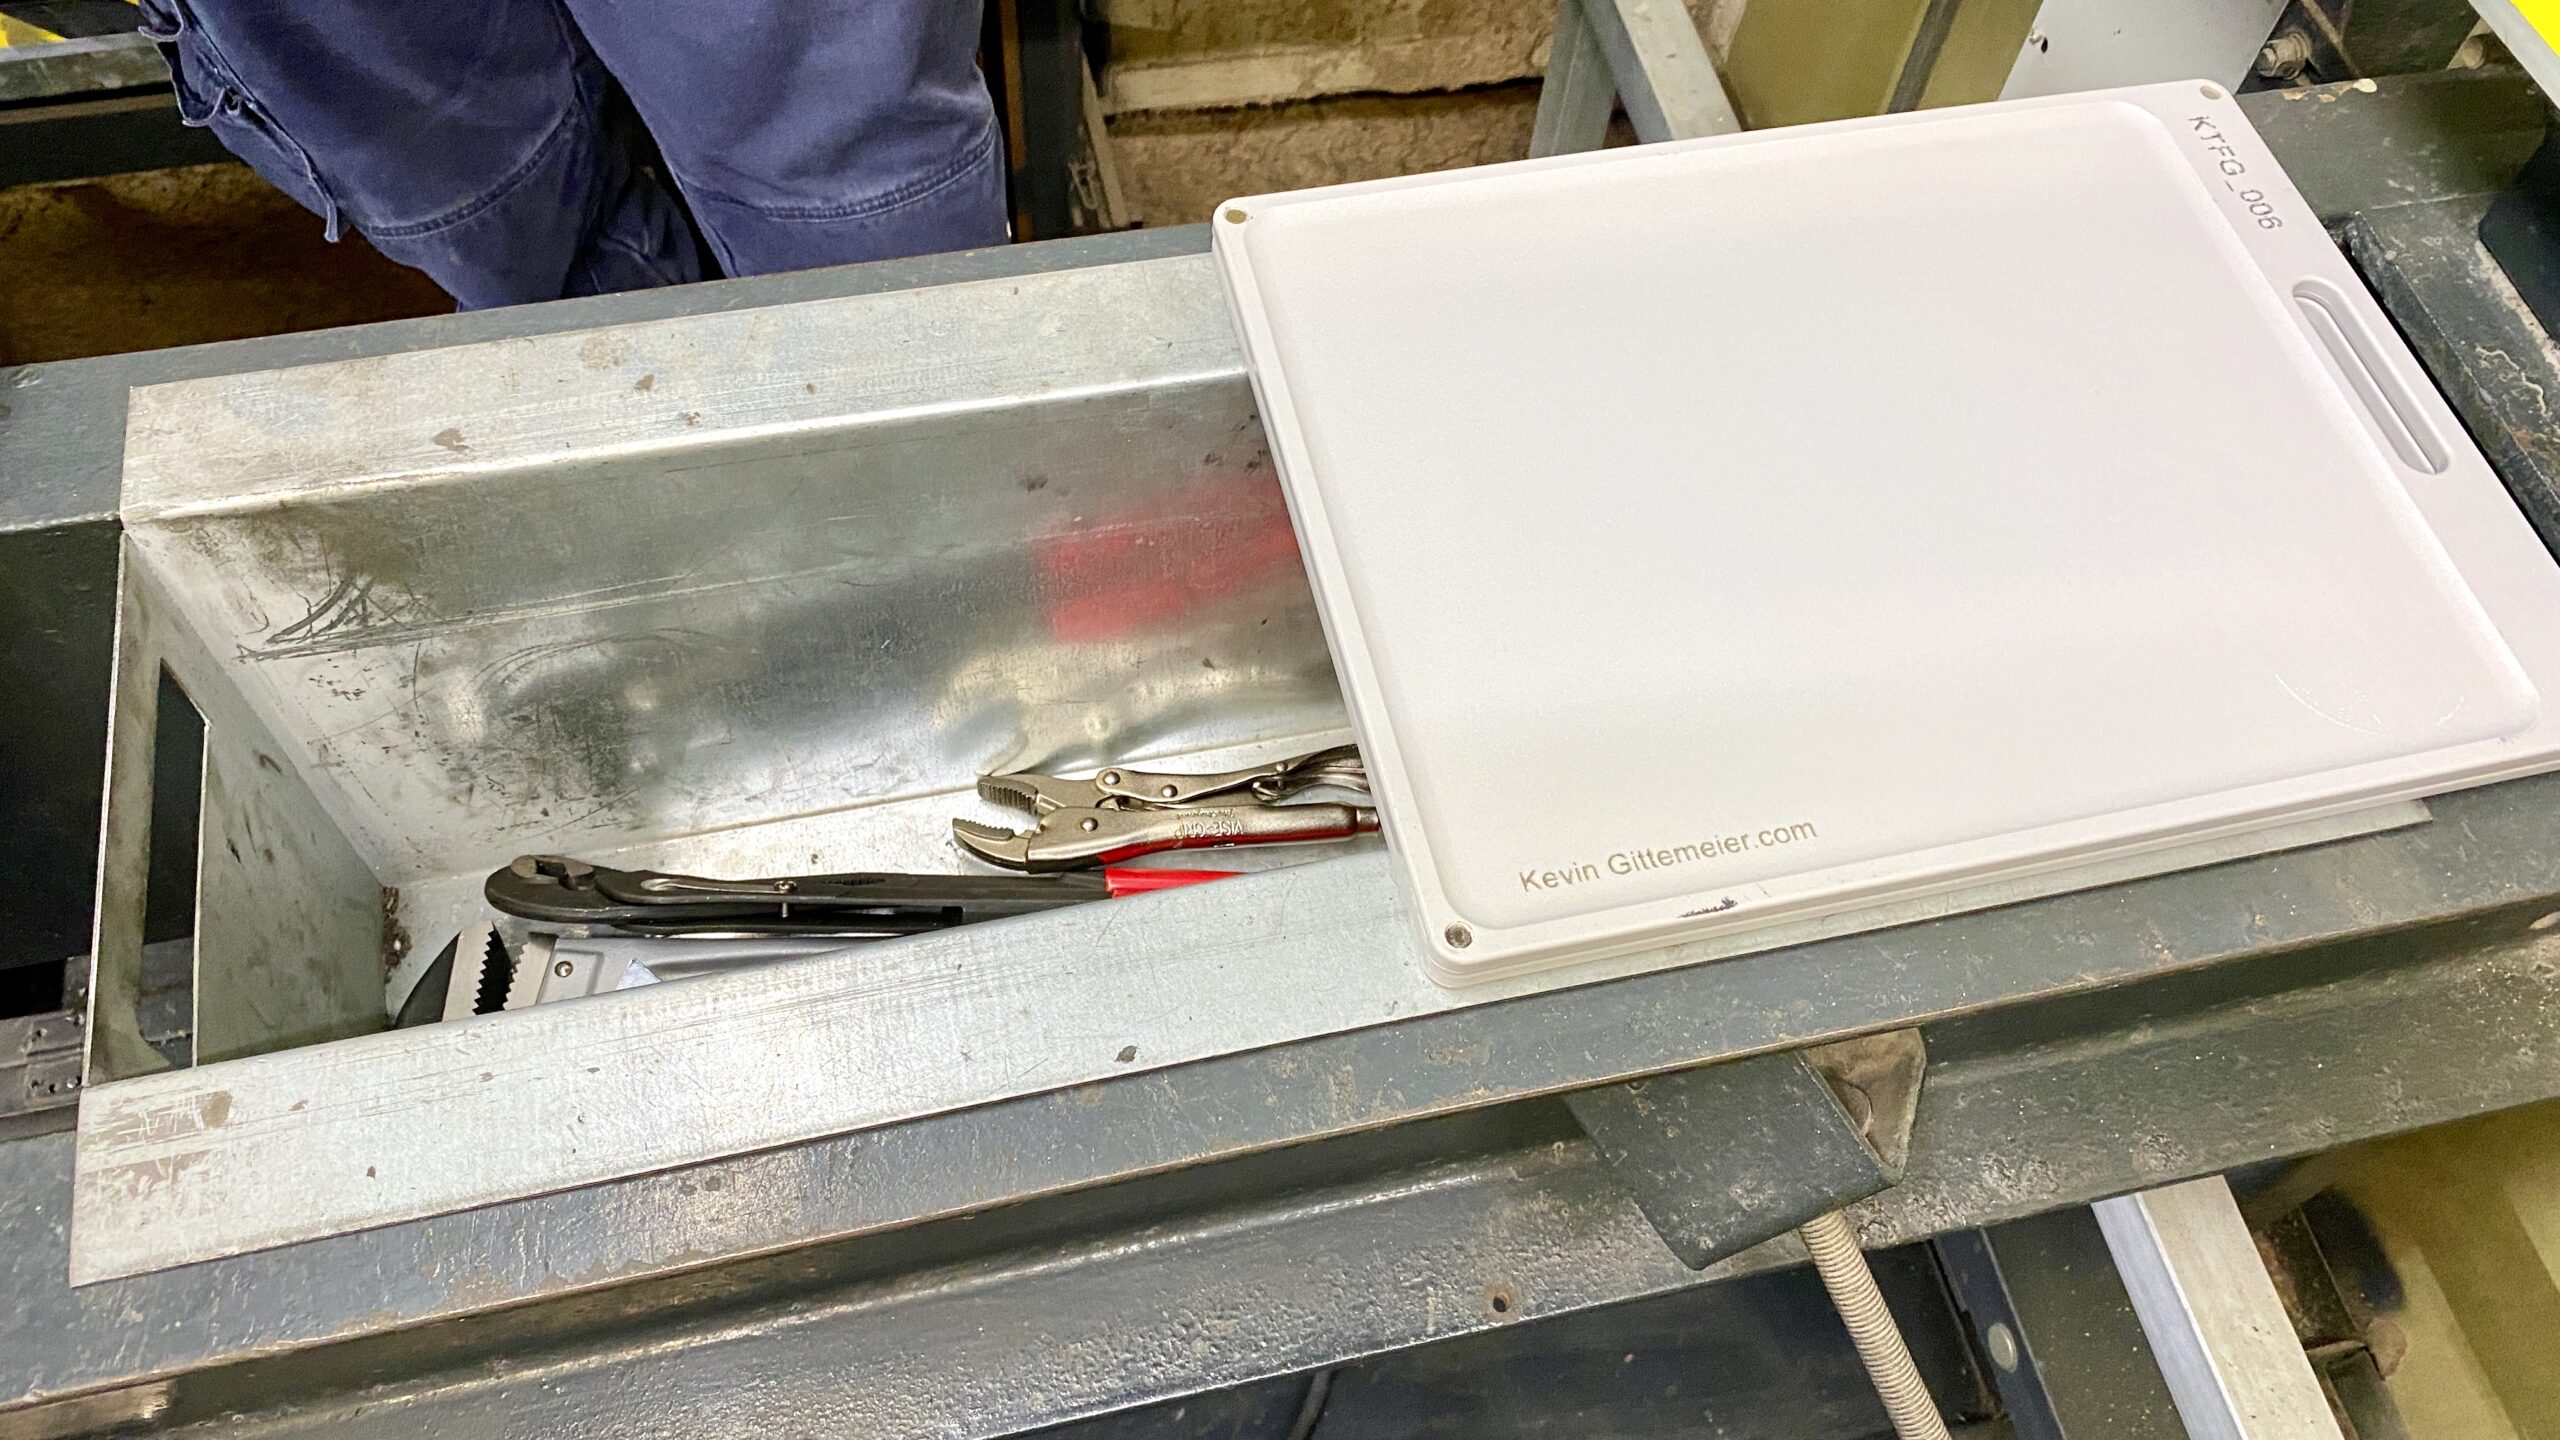
Crosshead Box
Ok what about that Crosshead Box mentioned earlier?
These Crosshead Work Boards work great for small tasks or just to temporarily hold tools.
For large repairs I designed two different Crosshead Boxes (1 Deep, 1 Shallow) both with Slide Trays for the top. I sent CAD drawings to two different metal fabricators and had several made. They work great. You can stand on them, walk across them, stand in them if you like. The tools and material are safety stored out of the way in the crosshead. Here is a photo of just the shallow one because I loaned all the others out. Designed and built back in 2008.
If interested in a Crosshead Box full post with CAD drawings, pics and video, let me know.
Xhead Work Board Build [KTFG 403]: https://youtu.be/KE2LjRiIgmk
Xhead Work Board Red [KTFG 404] : https://youtu.be/SKLdQbwQdZs
Xhead Work Board Blue [KTFG 405]: https://youtu.be/SyE7RUQNJCM
Xhead Work Board Gray [KTFG 406]: https://youtu.be/v10dk4yimCg
Help us get to 100K YouTube Subscribers! Click Here
Be sure to follow me on Social Media for Announcements & Giveaways:
Instagram: https://www.instagram.com/ktfg_9
Facebook: https://www.facebook.com/KTFG1
Reddit: https://www.reddit.com/user/KTFG
Pinterest: https://www.pinterest.com/KTFG9
Twitter: https://twitter.com/KTFG9
*Soon to have another giveaway with the next tutorial.*
Website: https://www.kevingittemeier.com
Youtube: https://www.youtube.com/KGittemeier
Want to help support the channel and website? You can with a small donation via Paypal and by using the affiliate links and banners which earns me a small commission at no extra cost to you while helping support this website and YouTube channel.
If any questions regarding a project or tutorial, ask in the Comment Section of the web post or YouTube video, not by email. That way the answer can help many people with the same question.
These look very functional and I’ll have to give them a shot after I try the laptop shelf first. I noticed the Maxpedition bag and was just curious what you use it for/carry in it? I have a few of their bags for personal use but never considered carrying tools in them. Very tempted to add one to my personal system. Thanks for putting this up!
Full post coming soon but some tools for when I don’t plan on needing any tools but will have enough tools to handle 90% of the problems I will encounter.
Fluke mini pocket meter, Alan wrenches, Miniflat bar, multi screwdriver etc. (will put full list tmrw and maybe some pics).
I like it because it’s crossbody hands free. I tried some other smaller ones for tools but like this better.
I put links to some of the tools like the mini fluke pocket meter on page 2 of the post.
Will add more.
So much to do, so little time.
Good luck on the shelf but make sure to get the exact folding brackets and magnets I recommend for best results.