DIY Compact Portable Magnetic Laptop Shelf Build Instructions
Page 6: Photos of Portable Magnetic Laptop / Utility Shelves in use
Page 1: Overview & Step 1: Drill Holes
Page 2: Step 2: Mount Brackets
Page 3: Step 3: Glue Magnets
Page 4: Step 4: Add Anti-Slip
Page 5: Options & Variations
Page 6: Photos of Shelf in Use (IUEC)
Page 7: Read More, FAQ, Recipient List
*Edit 2024; Dedicated web post on new Magnetic Bracket config
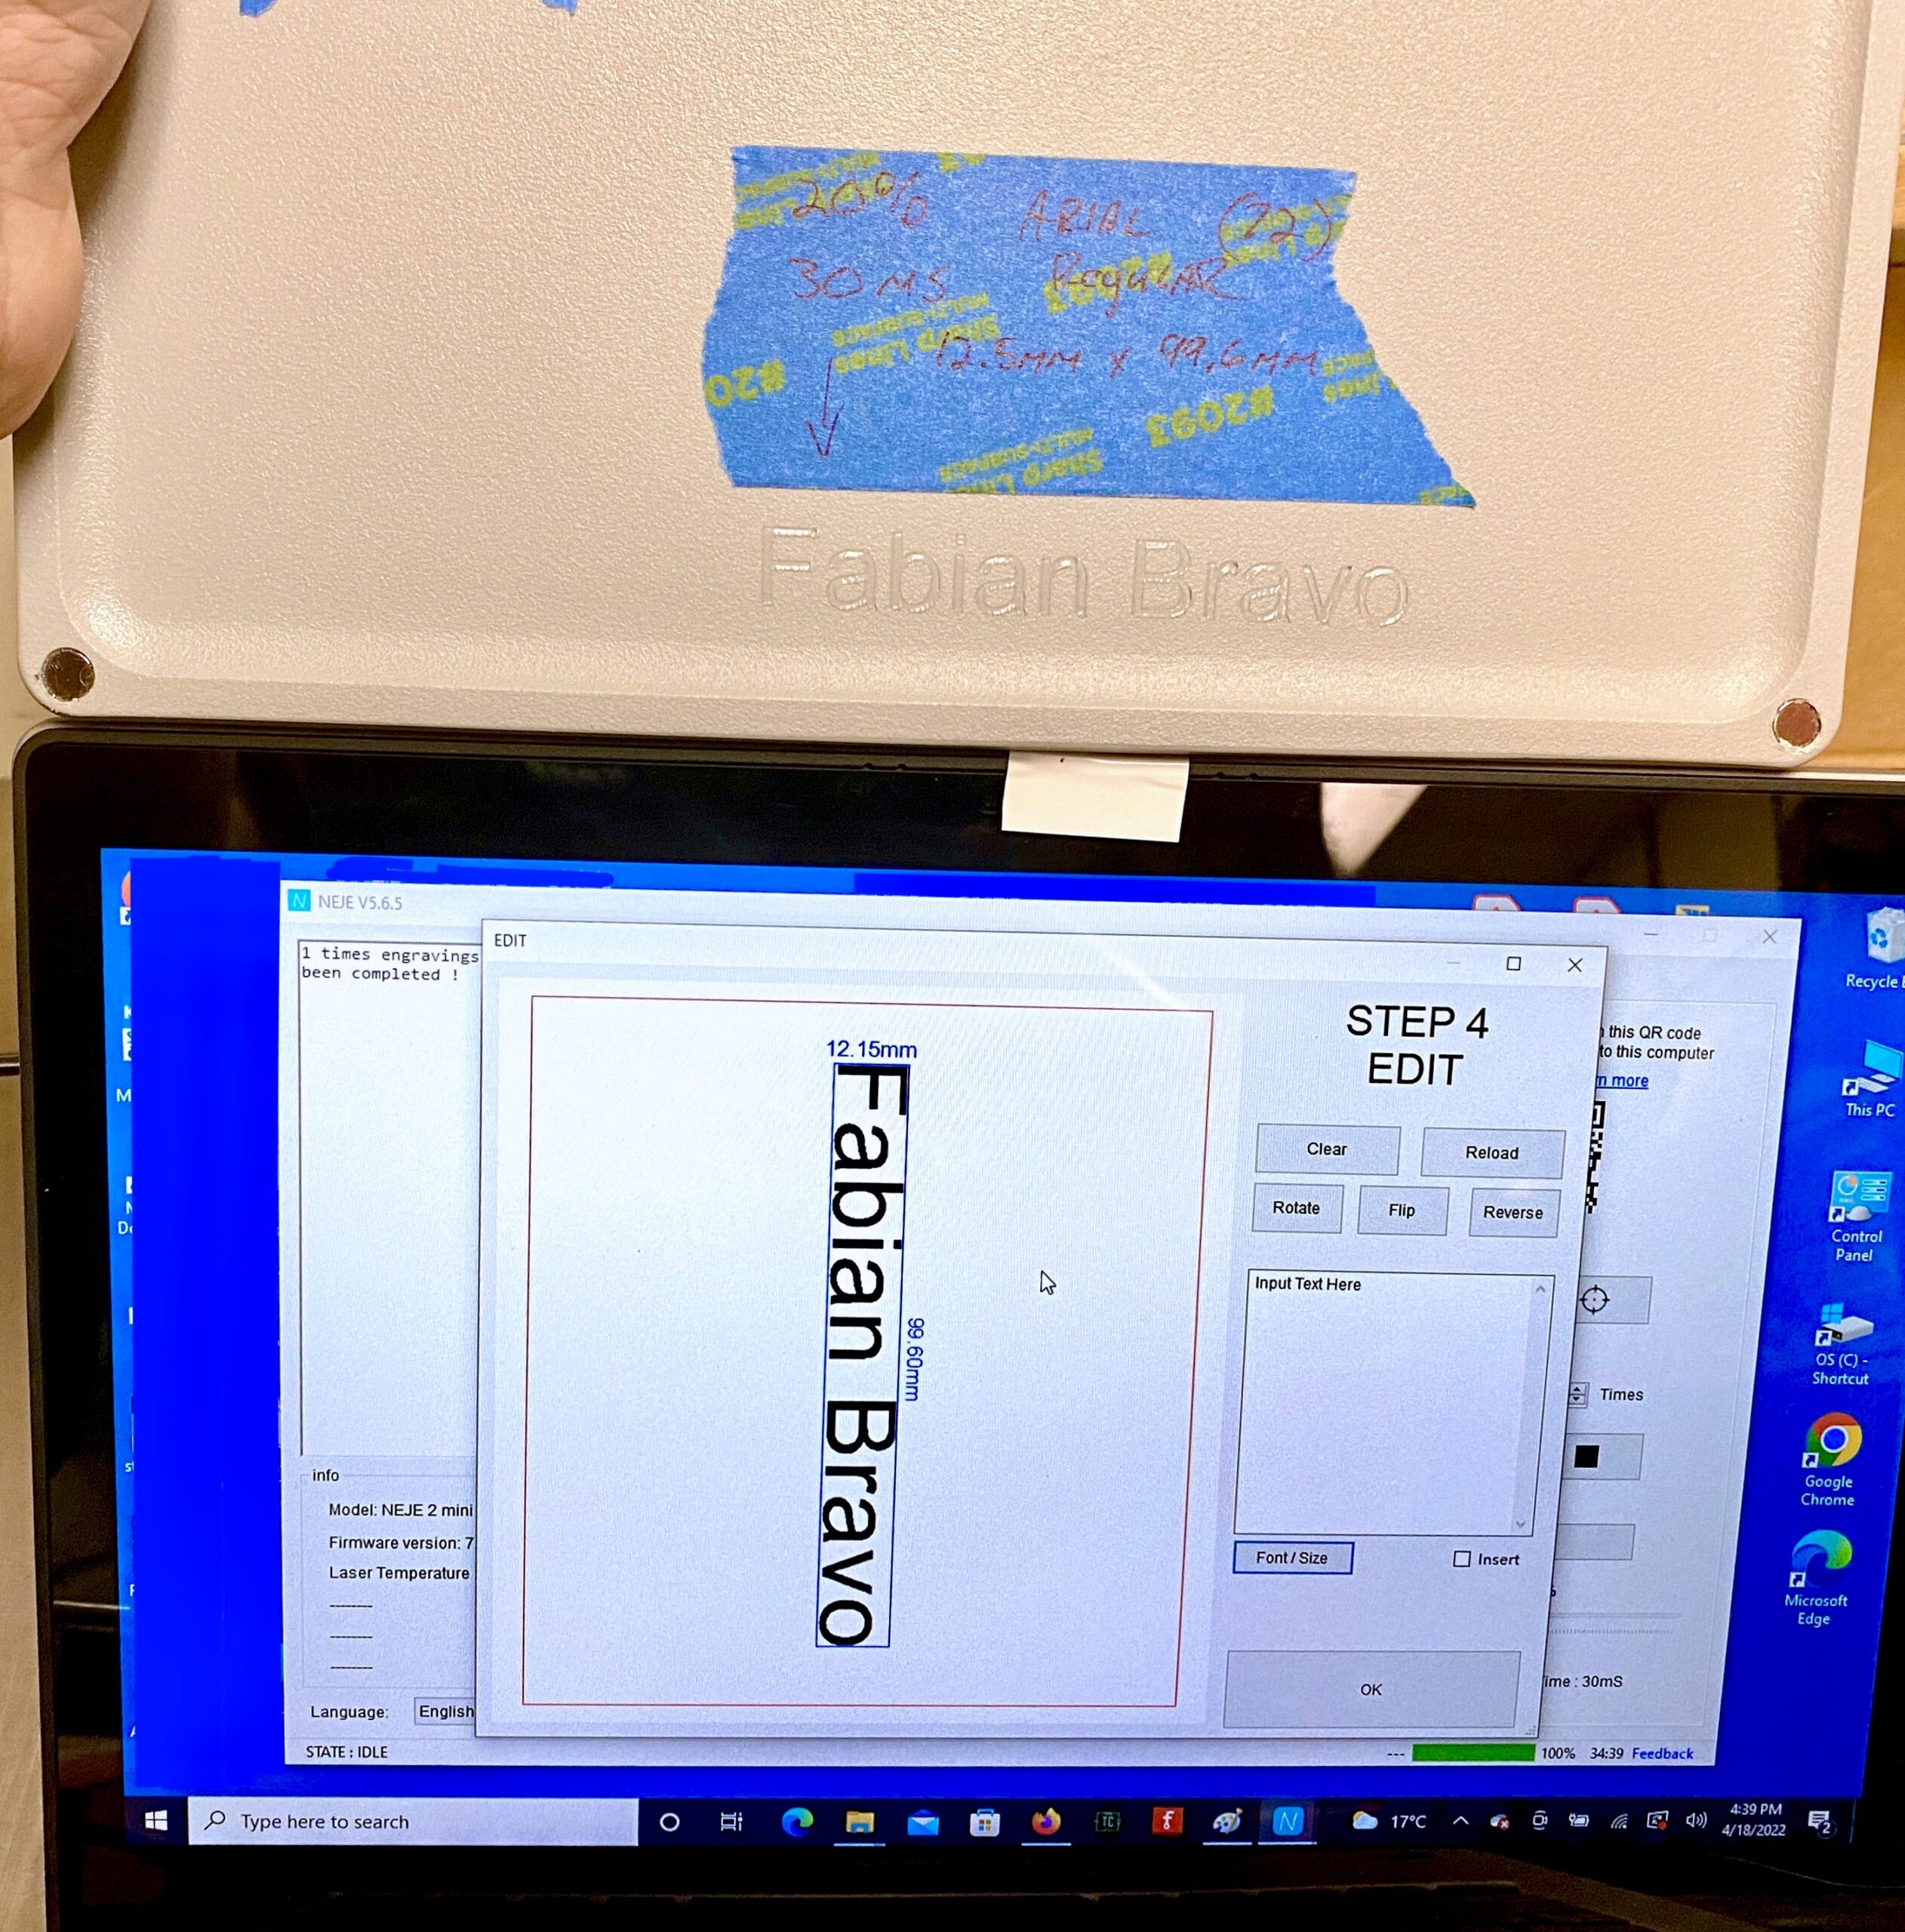
Now I laser engage the boards.
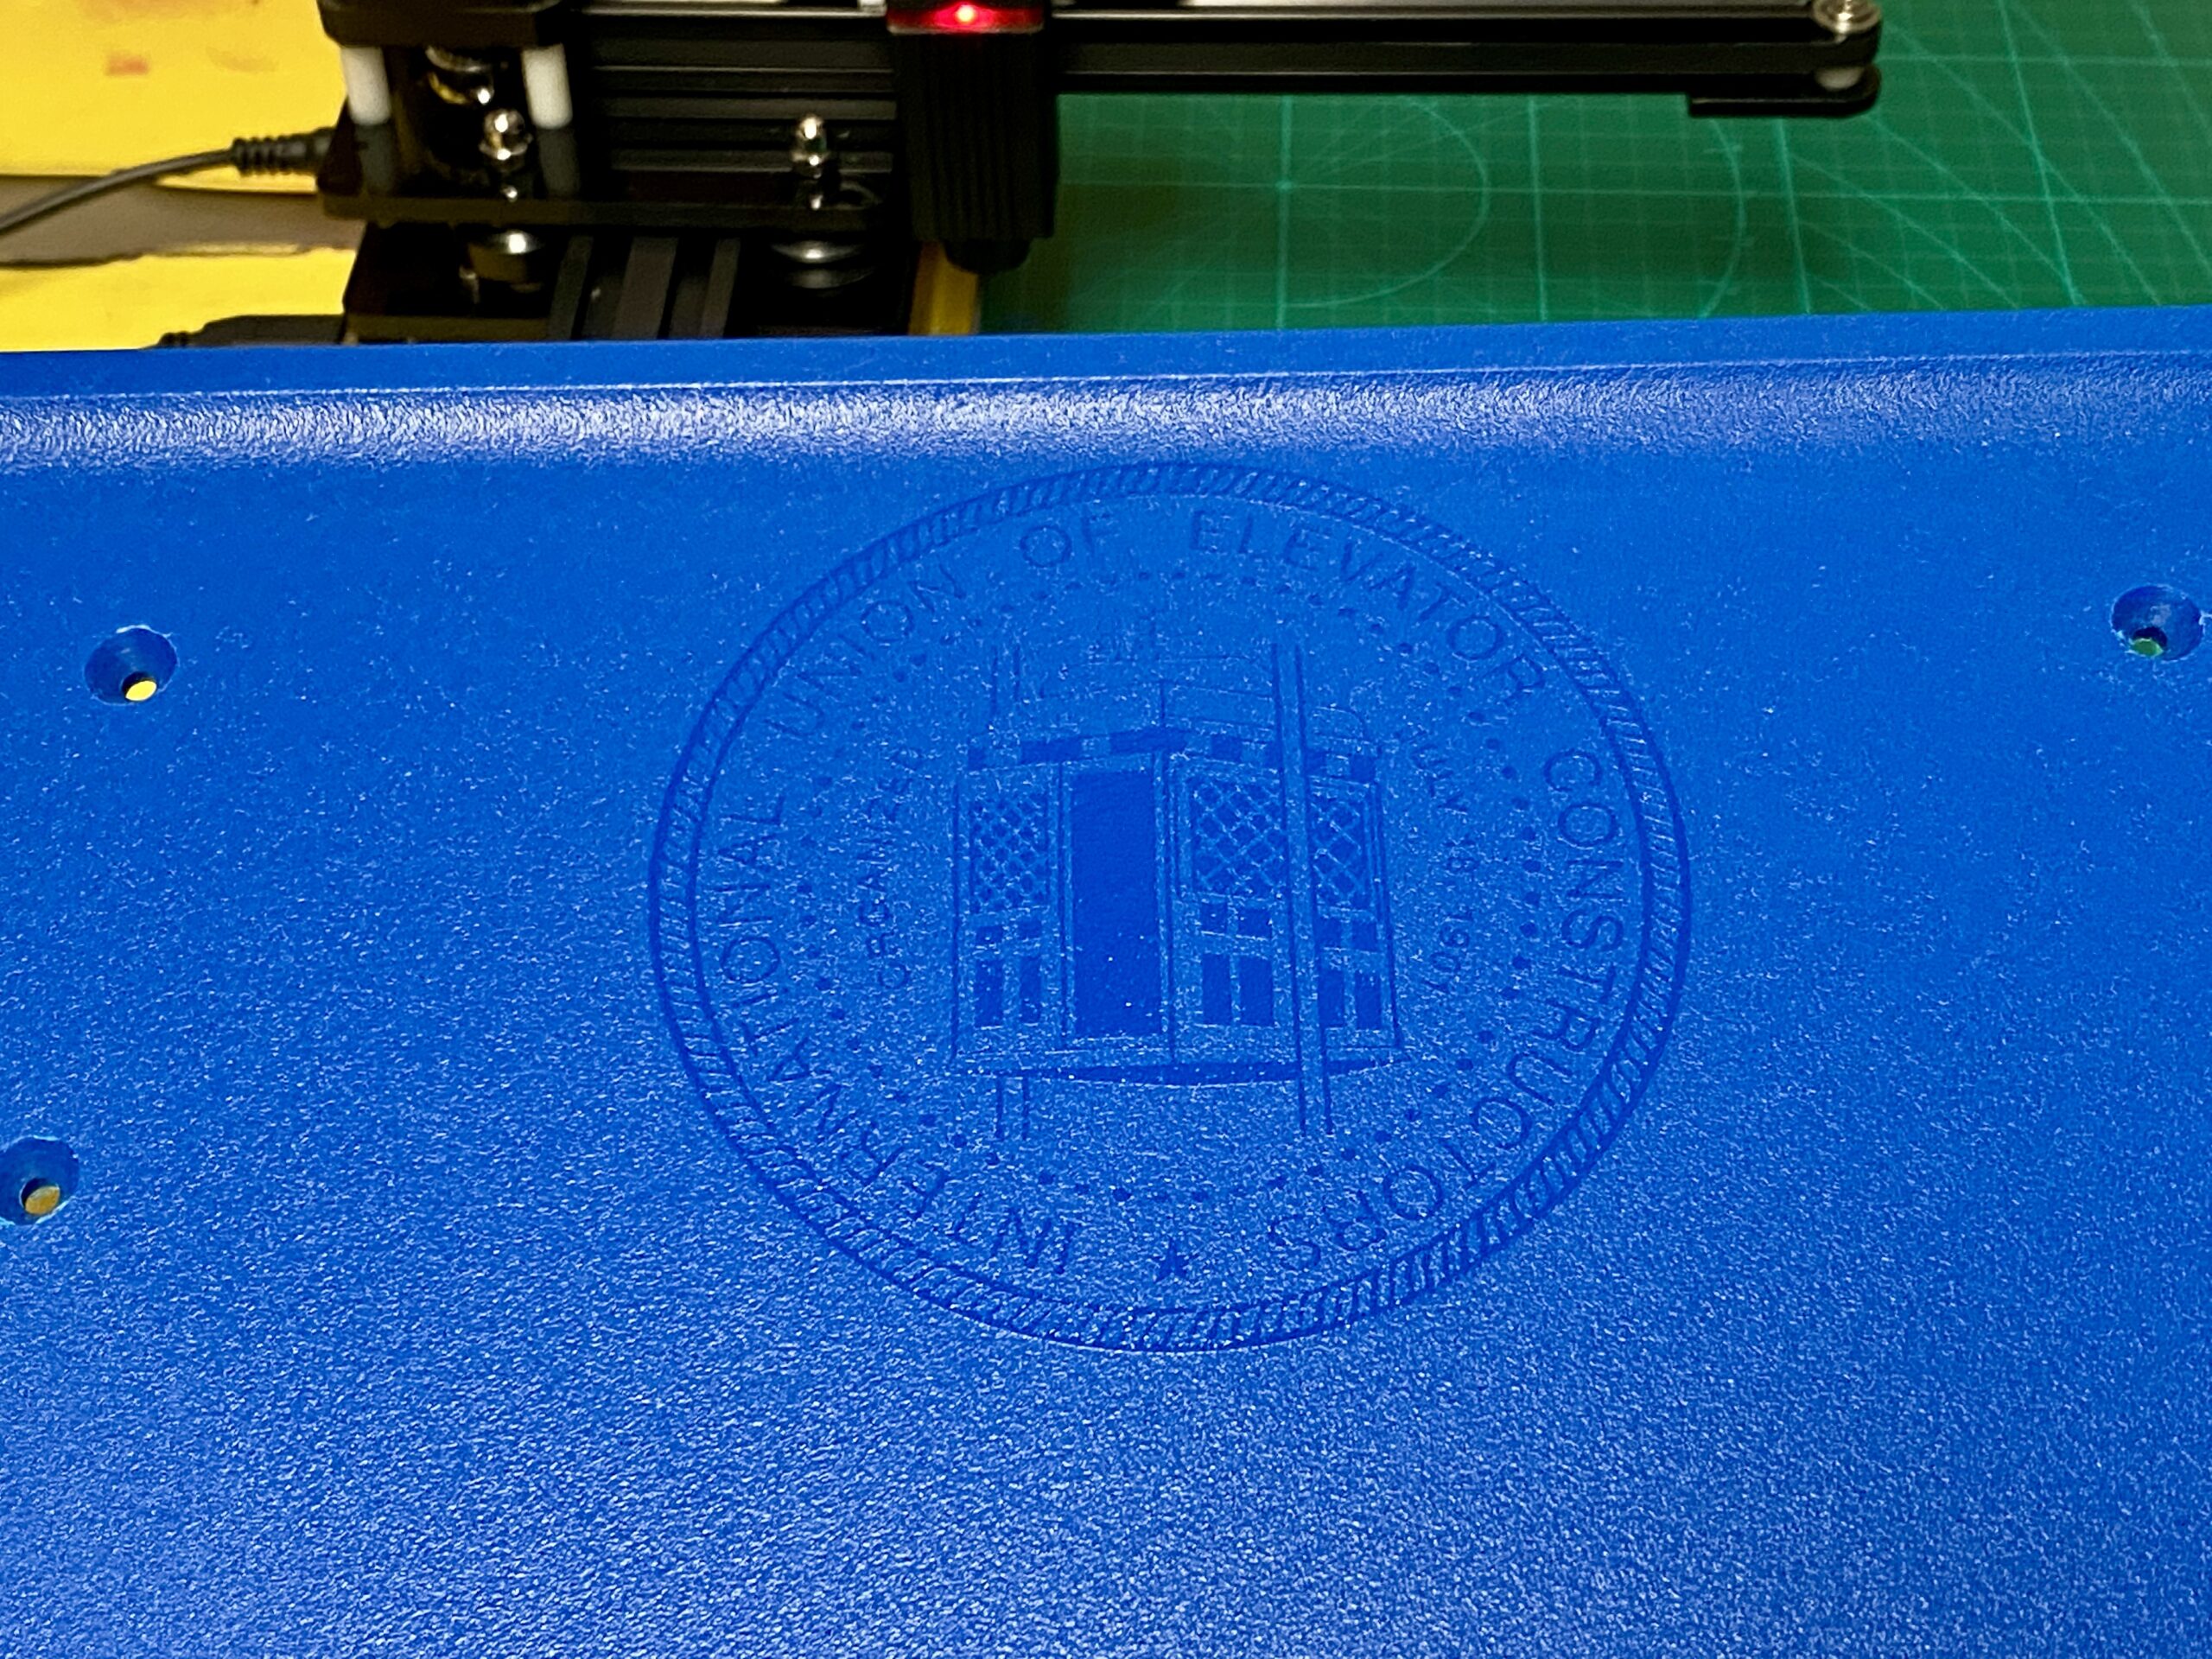


I just bought a cheap laser engraver without doing much research. I would buy better one in hindsight. Takes over 3 hours to burn the IUEC logo.
See magnetic crosshead board post

It’s a Push Button how difficult could it be?
Elevator push buttons were once simple.
Not any more but we have Fabian Bravo the button programming wizard with the tools and the know how.


Why won’t this old elevator run?!?
Wait…. should that motor somehow be coupled to the gearbox?
Something doesn’t look right… better plug up the computer!

Well that doesn’t happen everyday. Thats how you know you’re on an old cab, its magnetic.

Well that and the pull gate


Makes a nice utility shelf but I wish it were a recessed top.
I hate to have to repeatedly grab tools & material off the floor, even before I had a bad back.


And I hate to have a bad back because I like the active life.
Thats why I like my back saving carts and shelves!


I have found that I use these shelves much more for manuals, prints and material than for laptops.

Considering how useful this Portable Magnetic Utility Shelf if for holding material, I now recommend using 6 magnets on the top for the option to hold heavier material including Milwaukee Organizers.

Even though the elevator cab is not magnetic, the Portable Utility Shelf brackets fit between the handrail and cab creating an elevator shelf.
I don’t do the same task everyday so I need manuals and prints.


I have always had deep admiration for people like supervisors who didn’t need manuals or prints when in the field.
I would be a multi millionaire if I had that miracle talent!

Oh snap, Fabian got the UPGRADE!
We added a Velcro Cable Bag to Fabian’s Standard V2 Laptop Shelf


And he got a companion shelf for a set.
Its gonna get jelly around 32.

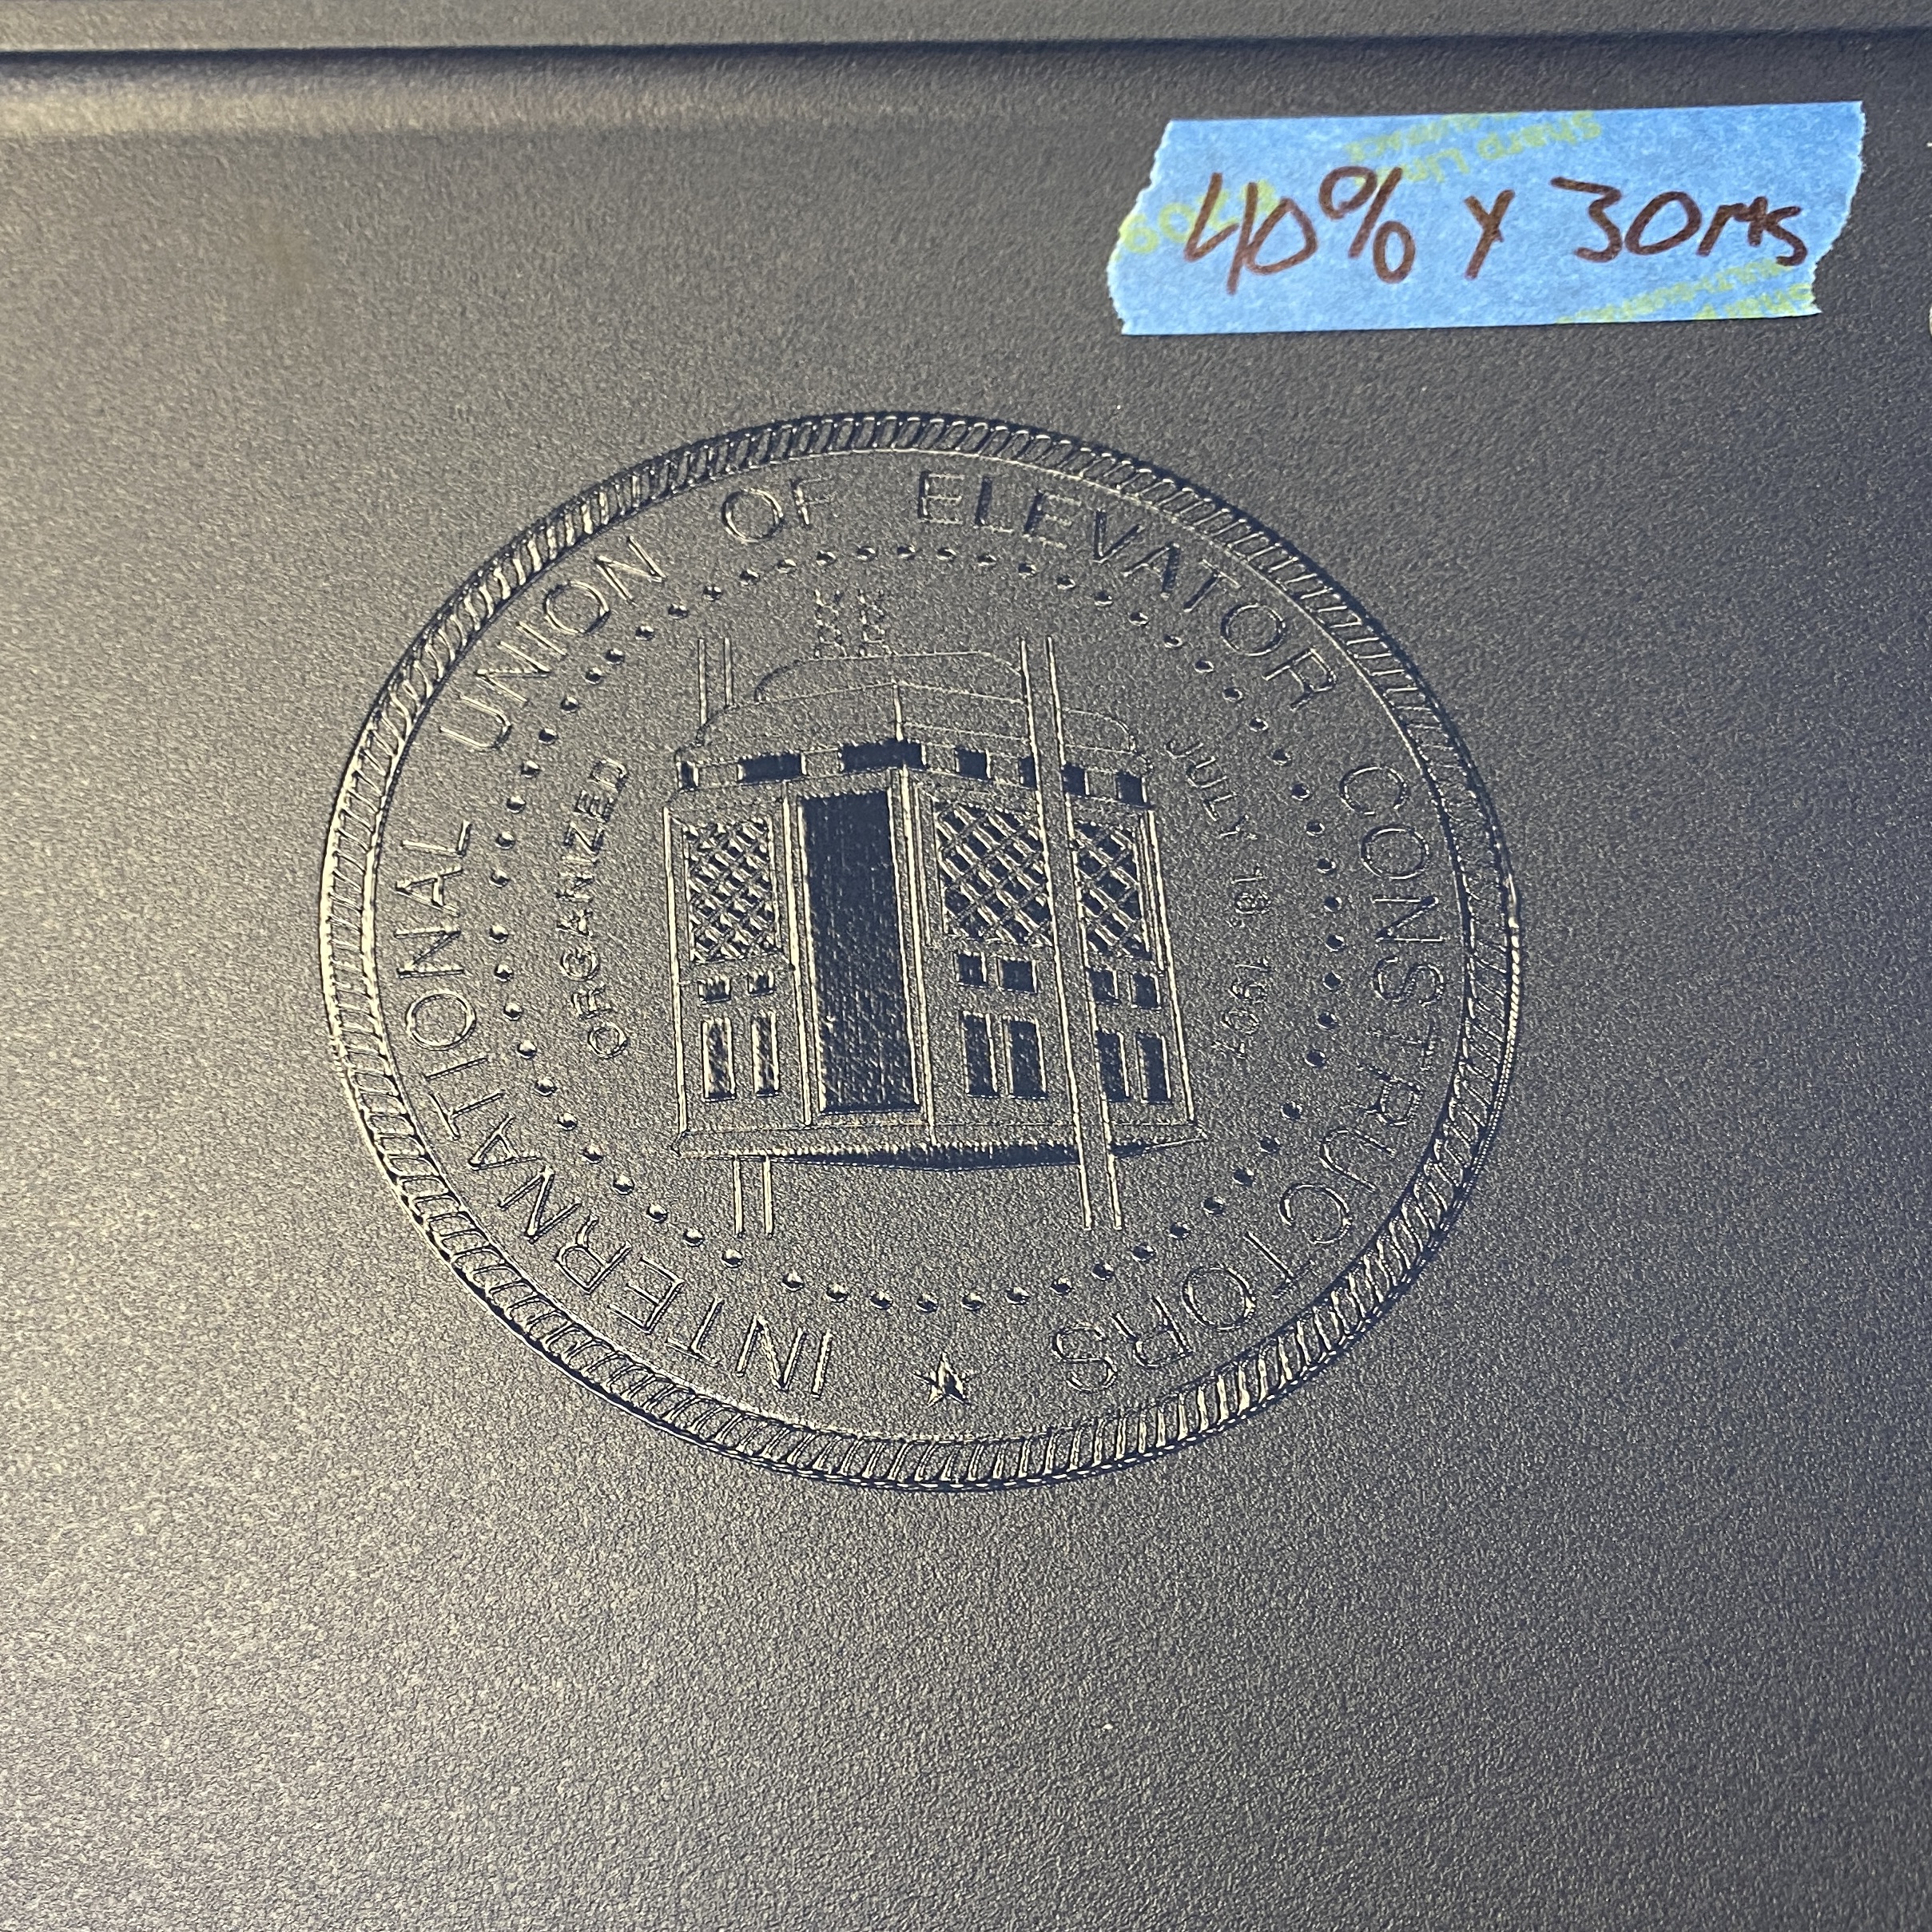
*Edit 2024; The above name and serial number etchings look so bad compared to the new laser engraved ones. Well you have to start somewhere, can’t improve off of nothing. Wait till version 3 shelf comes out!


Yeah, why not?


In Connor MacLeod voice
“There can be only 15”
Only 15 made by me at least, not counting prototype & full magnet demo model. *See note
- KTFG_001_: David Luther – Gray Recessed Top w Cable Bag
- KTFG_002_: Kevin Gittemeier – Red Flat Top
- KTFG_003_: Eric King – Aqua Recessed Top
- KTFG_004_: Fabian Bravo – Gray Flat Top w Cable Bag 1/2
- KTFG_005W: Fabian Bravo – Gray Flat Top Wide Hinges 2/2
- KTFG_006_: Andrew Sauer – Gray Recessed Top
- KTFG_007_: [ ? ? ? ] – White Flat/Flat Faberware
- KTFG_008_: Cole Bonno – White Flat/Flat Faberware
- KTFG_009_: Kevin Gittemeier – Gray Flat Top w Cable Bag 1/2
- KTFG_010W: Kevin Gittemeier – Gray Flat Top Wide Hinges 2/2
- KTFG_011_: Travis Hutcherson – Gray Flat Top w Cable Bag 1/2
- KTFG_012W: Travis Hutcherson – Gray Flat Top Wide Hinges 2/2
- KTFG_013_: Jake Waddell – White Flat Top w Cable Bag
- KTFG_014_: Raul Ramos – Red Recessed Top
- KTFG_015_: [ ? ? ? ]- White Flat Top
- Edit 2020_10 *See note
- KTFG_016_: Bud Oneal – Gray Recessed Top/Tool Holder mod
- KTFG_017_: Jimmy Jones – Red Recessed Top
- KTFG_018_: Kevin Gittemeier – Blue Recessed Top 1/4″ mags
- KTFG_019_: [ ? ? ? ] – Blue Recessed Top (not built)
- KTFG_020_: [ ? ? ? ] – Details to follow
- KTFG_021_: Tony Carter – Yellow Recessed Top
- KTFG_022_: Frank Mellor III – Green Recessed Top
- KTFG_023_: Frank Mellor Jr – Blue Recessed Top 1/4″ mags
- KTFG_024_: [ ? ? ? ] – Yellow Recessed Top 1/8″ mags
- Prototype: Red with Cup Magnets
- Full Magnet Experiment Model Red
*Edit; see new page 7 for full recipient list and details of each shelf.

I built several to test out different variations and have sold some to co-workers to help recoup my expenses but I have no intention of building and selling these. I want people to build their own and customize to their needs and preferences and send photos if they would like them featured on website and YouTube video.
*Edit Note, ok so I built some more variations to compare and maybe I will sell off the extras but they won’t be cheap because I’m not cheap!
$185+ depending on model. Email if interested Contact Page
Version 1 Laptop Shelf from original idea in year 2000.
I made the prototype then 4 additional variations for co-workers, each better than the last.
The Fifth and final one turned out excellent and I really would like to make one for myself but didn’t because Version 2 is superior and easier to make.
Recipients of Version 1
- V1 Prototype: Kevin Gittemeier
- V1 KG001: Erik Ross
- V1 KG002: Stacy Manus
- V1 KG003: Eric King
- V1 KG004: James “Bud” O’Neill
What about Version 3?
Magnetic Laptop Version 3 will put Versions 1 and 2 to shame. It will be more than than just a Laptop Shelf or Utility Shelf yet Version 3 will be thinner, lighter and more compact.
I have to complete some other projects before starting Magnetic Laptop Shelf Version 3 but I am optimistic I will complete V3 before the Cole-Bar ships!
Help Support this Content
If you find this content useful, consider Subscribing to my Youtube Channel: http://goo.gl/DDfVab and Social Media. This gives me more negotiation with sponsors which allows me to create more content.
If you have any questions, ask in the Comment Section of the web post or YouTube video, not by email. That way the answer will help others with the same question. I try to answer all questions.
Help us get to 100K YouTube Subscribers! Click Here
Be sure to follow me on Social Media for Announcements & Giveaways:
Instagram: https://www.instagram.com/ktfg_9
Facebook: https://www.facebook.com/KTFG1
Reddit: https://www.reddit.com/user/KTFG
Pinterest: https://www.pinterest.com/KTFG9
Twitter: https://twitter.com/KTFG9
*Soon to have another giveaway with the next tutorial.*
Website: https://www.kevingittemeier.com
Youtube: https://www.youtube.com/KGittemeier
Want to help support the channel and website? You can with a small donation via Paypal and by using the affiliate links and banners which earns me a small commission at no extra cost to you while helping support this website and YouTube channel.
If any questions regarding a project or tutorial, ask in the Comment Section of the web post or YouTube video, not by email. That way the answer can help many people with the same question.
totalElement is my magnet supplier and their magnets can be seen in many of my builds and science projects. totalElement offers great prices, fast shipping and excellent customers service.
https://totalelement.com/
Get 10% off using my code KTFG at checkout!
- Most commonly requested magnets:
- 1/2 x 1/2 x 1/16 Block Magnet: buy here
- 1/4 x 1/4 x 1/32 Block Magnet: buy here
- Strong HD Magnetic Push Pins: buy here
- Magnetic Swivel Hook HD 55lbs: buy here
- Mounting Magnets Page: shop here
- Magnet Sale Page: shop here
Page 1: Overview & Step 1: Drill Holes
Page 2: Step 2: Mount Brackets
Page 3: Step 3: Glue Magnets
Page 4: Step 4: Add Anti-Slip
Page 5: Options & Variations
Page 6: Photos of Shelf in Use (IUEC)
Page 7: Read More, FAQ, Recipient List
*Edit Note, ok so I built some more variations to compare and maybe I will sell off the extras but they won’t be cheap because I’m not cheap!
$200+ depending on model. Email if interested Contact Page
*Edit 2024; Dedicated web post on new Magnetic Bracket config
Hey Kevin, how is version 3 coming along? I can’t imagine what your plans are for making it “thinner, lighter and more compact.” I’ve been a lurker for a while as I was going to make my own invention just as you have done, but you have done a ton of the trial and error as well research into making your shelf.
I came up with the same idea a year ago when I saw a shelf like it mounted with screws in a PLC console and I told the tech I was working with that it would be awesome to mount one of those with strong magnets and have it moveable around all of our different work areas and sites… they just shrugged and I stayed busy with work as I was the FNG. Finally with a little more down time and days of research several months ago, I saw that you had the same drive as I for a product/project like the one you have created. Anyhow, great work thus far on your personal project, I hope to order the materials soon so that I can have a couple of shelves lying around in my laptop bags/work truck.
Thanks,
Version 3 won’t start for a while as I have other projects to complete first.
Version 1 took me nearly 20 years to complete when I found the half started project while cleaning my basement and finally finished it. Version 2 had been in my head for years but took that long to find the proper hinges.
The key to Version 2 is the low profile hinges and the magnet configuration. I will explain the science behind the magnet config in a future update but its important to do the magnets exactly as I have, alternating the poles.
I have one model that uses 1/32″ thick magnets and holds very strong. Yes 1/32″ paper thin magnets. The key is the alternating poles.
I will update this post in the future with more info but time is very limited and I make little to no money off these posts (1-3% off amazon links) so its hard to justify the time.
Good luck and remember you can help support this website and YouTube channel by Subscribing, hitting Like & Commenting on videos.
Help us get to 100k Youtube Subscribers: http://goo.gl/DDfVab
Latest YouTube video: https://youtu.be/HyrhW_gnQEM
Kevin thank you so much……it works great it’s perfect for relay testing on switch gear.
I changed it a bit and used clear acrylic instead …it’s better for me
Thank you
Chris
That’s awesome! If you like email some photos and I will post them on a dedicated section to display peoples variations.
Did you use acrylic or Lexan? I have found in my experience Lexan is easy to cut and drill than acrylic. For example I used Lexan on this panel mount build https://youtu.be/a826q0I0a_Y buy used acrylic on a previous build https://youtu.be/YOzw9btb–k
I do card access for a living and this shelf is amazing! I made two for myself and am about to assemble two more as gifts for my coworkers (you should see the jealousy in their eyes when I snap it onto a panel).
That’s awesome! I just had a conversation with a national tech support troubleshooter (in elevator industry) and he mentioned that he had stumbled on my website from the laptop shelf post. For years now several of those brackets sell per week (according to my Amazon affiliate data). That’s hundreds of folding shelves built. I only make a few cents per purchase but it’s cool to think the post and YouTube videos inspired or assisted that many people to build one. I first came up with the idea in the year 2000 after seeing elevator techs hold laptops by hand. If you like, email some photos and I will post them on a new page on the post of viewer builds.
Hello Kevin,
Fantastic Idea and thanks for sharing with everyone. My question is about the magnet. Does the magnet can damage hard hard drive or any other parts on the laptop? How strong the magnet should be to effect and damage the hard drive?
Thanks,
Thanks, and good question.
Anything is possible but practically, no. Remember powerful magnets are in hard drives but fields are shunted. Just don’t store the laptop shelf magnet side touching the laptop (likely would still be fine but just to be on safe side). Store it cutting board side towards laptop. I will make an edit fully explaining the magnetic shielding, concerns etc later today but it’s important to use the magnets I specify and alternate poles.
I’ll post my edit as a reply here as well.
Dude. Can I please just buy a version two from you ? Email me please. Kevdok13@gmail.com
I do fire alarm programming a lot and am always struggling with my tablet. This is amazing but I want it to be top quality and you seem to have all the small bugs worked out beautifully. If so let me know
Sure for enough money but once you add my price + shipping cost you may just want to build your own for around $50 in material.
I would be willing to sell some of the versions I already have built for $150 + shipping. I have no idea what shipping would cost but if you are interested I will find out. The remaining models are listed on page 6 towards the bottom: https://www.kevingittemeier.com/magnetic-shelf-v2/6/
I understand the struggle! Having a portable shelf can be a life saver.
Hey Kevin,
Have you ever tried this with a wooden board? I don’t see any draw backs.
I have not.
I like to use these cutting boards because they are light weight, inexpensive, durable, readily available and most of all suite the task perfectly.
A wooden board would look very nice and work well but not ideal for a hard use application in the field like I use mine. I have thought about making a nice wooden one just as an example though and posting video and pics.
Keep a lookout on my YouTube channel: https://www.youtube.com/user/KGittemeier
Do you have another source for hinges that you like? As I type this, Amazon only has one of the 8″ brackets of the type you recommend in stock.
Or even an alternate hinge?
I have no acceptable alternate (I have tried many) and I have not been able to find that hinge anywhere else. Keep in mind that they are sold in pairs so that “1” in stock will allow you to make a shelf. They come in and out of stock often so keep checking if you want more.
When I see them in stock I buy several bc more and more co-workers keep wanting to buy shelves from me rather than build it.
Also note that I just added a page 7 with more info. More pics and info coming soon about “Pro Version”.
What kind of glue do you use? Also if that was a little wider I could clean a fish on it
Elmer’s Glue, and it’s plenty big enough to clean your gold fish crackers.
Thank you for this DIY, the details are awesome. I plan to make my own, only bigger. I have a 17″ laptop that is 16″ wide. I also have a laptop top tray that I use when sitting in a chair or bed at home. So, I plan to buy a cutting board that is 24″ by 14″ by 1/2′ thick. My question is, how thick are the boards that you use? I need to know the thickness of your board in comparison to the bolts you use so I can size bolts for my application. How far do your bolts stick out from the bottom of your board? (thickness of board + how far the bolts stick out should = the total length of bolt needed).
Also, in your opinion, do you think a 14″ board (front to back) would be OK with the hinges and amount of magnets you use? Or, do you think there may be an issue with magnetic attraction to the surface due to the additional leverage from the longer board?
The Mainstay/Dexas boards I use are about 1/4” thick with 3/8” edges because they have a recessed top so a lip around the edges. With this board, 12mm screws recessed works well. You will need it to be about 3/16″ passed the board to pass through folding hinge and thread the nut but too long interferes with hinge closure. Be sure to account for recess if you plan to recess your screws.
A 24” x 14” by 1/2” thick is a big heavy board. I would try to make do with something a little smaller. I have seen the plastic cutting boards like mine, bigger than my dimension but still about same thickness and light weight. I believe the linked bracket will work will a smaller lighter board.
For your board you will likely need a larger bracket (larger B measurement in diagram on link) The magnets are plenty strong enough but the leverage will be the issue. At one time they sold a lager hinge on the same link but I don’t think the B measurement was any longer, only the A measurement.
Good luck and let me know how it goes.
Super excited to get started on this project of yours myself! Just purchased all materials. I’m going with the Farberware 11” x 14” board. Your instructions above recommend to go with the 8mm M4 bolts. However while comparing the length of the bolts with the thickness of the board (just over 1/4” thick) I won’t appear to have enough bolt left over to thread the nut. Perhaps the thickness of the Farberware has changed.
After reading the most recent comment above, I should use a 12mm M4 bolt with a 1/4” board, correct? Or am I not recessing the bolt in far enough?
Yes 8mm. My measurements account for using flathead countersink screws and countersinking the hole. The depth of countersink must be precise though because too much tread on the other side (the nut side) will result in the folding hinge not closing properly (see pic page 2). Ideally the bolt end will be flush with the nut with no protrusion or even a little recessed. Locktite on screw or dab of glue on screw nut once secured, don’t overtighten.
I recommend countersinking a little shallow first then checking. You want the heads flat with surface and not protruding but they can can be recessed a little (below surface) without issue.
I also recommend just buying 8, 10 & 12mm lengths. They are not very much money, you’ll be sure to have what you need and may use them for other projects as well.
I do my magnets different now and just completely cover the entire bracket with 3 rows of 20 1/4″x1/4″x1/32″ thick magnets. I’ll try to put a pick and notes on the site this weekend.
Here is a video with one done with this magnet configuration and spray painted:
https://youtu.be/KE2LjRiIgmk?si=CaGfWp5UsEvuFkRV&t=210
Good luck and let me know how it turns out.
Why not just buy this side shelf for toolboxes from harbor freight and put the magnets on it?
https://www.harborfreight.com/side-tray-for-5-drawer-mechanics-cart-and-6-drawer-full-bank-cart-yellow-59447.html
I own that folding shelf and while it’s great for what it is, it’s too big and heavy to be a portable laptop shelf (for me). It won’t fit in a laptop bag or tool backpack. It’s bigger than it may seem from photos.
I’ll post a video of it in my Conex storage container web post.
Thanks for the suggestion though.
I have long searched for something similar but smaller but I have yet to find anything adequate.
2024; In 2021 I started experimenting with 1/8” x 1/8” x 1/32” and 1/4” x 1/4” x 1/32” super thin magnets which I find to be far better for my portable magnetic shelves than the 1/2” x 1/16” magnets. I now recommend the 1/4” x 1/4” x 1/32 for best compromise of functionality, ease of build and cost (1/8” is better but harder to build and more costly). I also use new magnet coating, see dedicated post here https://www.kevingittemeier.com/magnetic-folding-shelf-brackets/
Found your site trying to come up with a similar idea. I your execution but I’m not sure if the quality you sought/attained is really something I care about compared to ease of assembly–the application I’m considering is a folding shelf for a pellet grill which has some heavy duty steel construction to stick to and would be relatively ‘permanent’ but would prefer not to drill into the grill. I was considering using folding brackets similar to yours with two round bolt/nut magnets thru the pre-existing mounting screw holes. It says you originally started with ‘cup’ magnets which I thought might be what I’m thinking, although the picture of the prototype looks like a bar magnet to me? Perhaps I don’t know magnet terminology.